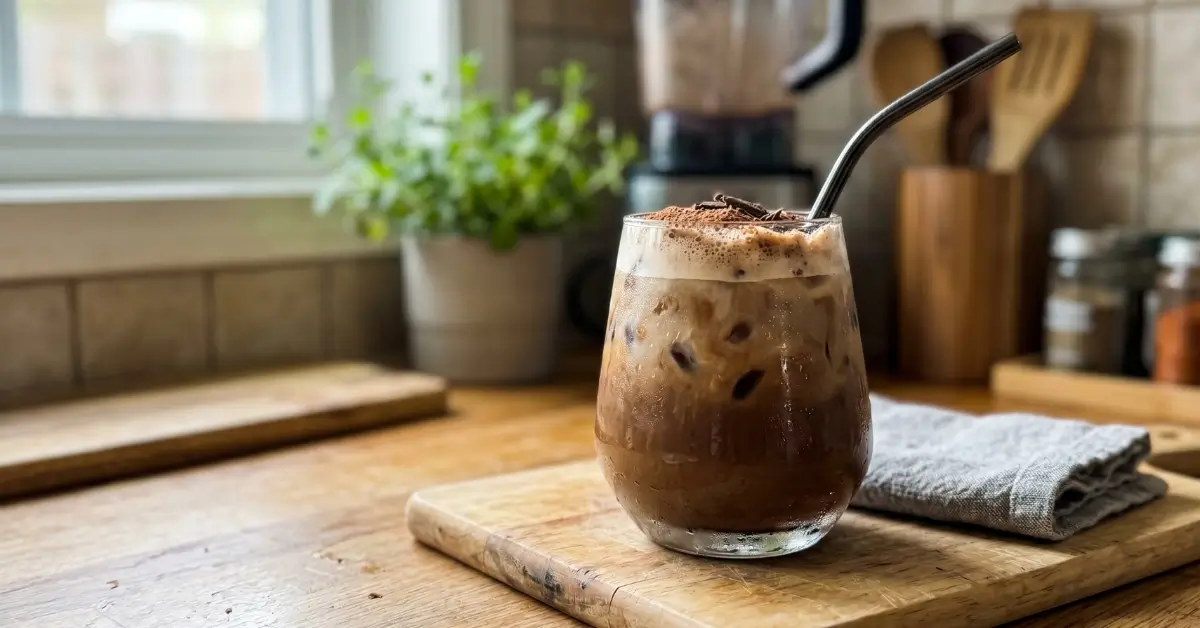
1. Skinny Vanilla Sweet Cream Iced Coffee
Ingredients
For the Iced Coffee
- 1 cup strong brewed coffee, fully chilled.
- 1 cup ice cubes.
- 1 to 2 tablespoons sugar-free vanilla syrup, depending on desired sweetness.
For the Skinny Vanilla Sweet Cream
- 2 tablespoons unsweetened almond milk.
- 1 tablespoon half-and-half.
- 1/4 teaspoon pure vanilla extract.
- 1 teaspoon sugar-free vanilla syrup.
Optional Ingredients
- 1/8 teaspoon ground cinnamon for a warm flavor.
- 1 teaspoon zero-calorie granulated sweetener for extra sweetness.
- 1 tablespoon light whipped topping for serving.
- 1/2 teaspoon unsweetened cocoa powder for a light mocha twist.
- 1 teaspoon sugar-free caramel syrup for a vanilla-caramel variation.
Ingredient Substitutions
- Strong brewed coffee: Substitute cold brew concentrate diluted according to package directions, or use 2 shots of chilled espresso plus enough cold water to make about 1 cup.
- Unsweetened almond milk: Use unsweetened oat milk, cashew milk, skim milk, or another low-calorie milk.
- Half-and-half: Replace with fat-free half-and-half for a lighter option, or use 1 tablespoon additional milk for a dairy-free version.
- Sugar-free vanilla syrup: Use regular vanilla syrup, but keep in mind that calories and sugar will increase.
- Pure vanilla extract: Vanilla bean paste can work, although it may add a small amount of sugar depending on the brand.
Equipment Needed
- Coffee maker, French press, pour-over brewer, or cold brew setup.
- Liquid measuring cup.
- Measuring spoons.
- Small bowl, cup, or glass measuring cup.
- Spoon or small whisk.
- Handheld milk frother, optional.
- 16-ounce drinking glass.
- Long spoon.
- Refrigerator for chilling the coffee.
Step-by-Step Instructions
1. Brew the Coffee Strong
Brew 1 cup of strong coffee using your preferred coffee maker. For the best flavor, use slightly more coffee grounds than you normally would because ice and sweet cream naturally soften the coffee flavor.
There is no special cooking temperature required beyond your coffee maker’s normal brewing process. Most drip coffee brewers work best when water reaches approximately 195°F to 205°F during extraction.
The finished coffee should look dark and smell rich, not pale or watery.
Do not start with weak coffee. Once ice is added, weak coffee can taste flat.
2. Chill the Coffee Completely
Let the brewed coffee cool briefly, then refrigerate it until cold. For food safety and better refrigerator temperature control, avoid placing a large amount of steaming-hot liquid directly into a crowded refrigerator. Since this recipe uses only 1 cup, you can transfer the coffee to a heat-safe container, let it stop steaming, then chill it.
For the fastest method, brew the coffee ahead of time and refrigerate it for at least 1 to 2 hours.
Overnight chilled coffee works especially well for a quick morning drink.
The coffee should feel completely cold before it touches the ice.
Pouring hot coffee over ice causes rapid melting and produces diluted iced coffee.
3. Make the Skinny Vanilla Sweet Cream
In a small bowl or measuring cup, combine.
2 tablespoons unsweetened almond milk.
1 tablespoon half-and-half.
1/4 teaspoon pure vanilla extract.
1 teaspoon sugar-free vanilla syrup.
Whisk for about 20 to 30 seconds. If using a handheld milk frother, froth for 10 to 15 seconds.
You are not trying to create stiff foam. The goal is a light, pourable cream with tiny bubbles.
The mixture should look slightly thicker and lightly foamy on top.
Do not over-froth the sweet cream until it becomes mostly foam. It should still pour easily into the coffee.
4. Fill the Glass With Ice
Add 1 cup of ice cubes to a 16-ounce glass.
Large, solid ice cubes are ideal because they melt more slowly than small crushed ice.
For an extra-strong drink, freeze leftover coffee in an ice cube tray and use coffee ice cubes instead.
5. Add the Chilled Coffee and Vanilla Syrup
Pour 1 cup chilled strong coffee over the ice. Add 1 to 2 tablespoons sugar-free vanilla syrup.
Stir for about 10 seconds so the vanilla flavor is evenly distributed.
The coffee should remain dark brown and cold, with minimal immediate ice melting.
Adding too much syrup before tasting. Sugar-free syrups vary widely in sweetness between brands, so start with 1 tablespoon.
6. Pour in the Vanilla Sweet Cream
Slowly pour the prepared sweet cream over the iced coffee.
For a coffee-shop-style appearance, pour it gently over the back of a spoon. The cream will create pale swirls through the darker coffee.
You should see soft, cloudy ribbons of vanilla cream moving through the drink.
Let it sit layered for a few seconds if you like the look, then stir before drinking for the most balanced flavor.
7. Taste and Adjust
Take a sip before adding anything else.
If the coffee tastes too strong, add 1 to 2 tablespoons additional almond milk. If it needs more sweetness, add 1 teaspoon sugar-free vanilla syrup at a time.
Serve immediately while the ice is still solid and the coffee is cold.
Nutrition Facts
Cost To Make This Recipe
Item – Estimated Cost (USD).
Strong brewed coffee – $0.45.
Unsweetened almond milk – $0.10.
Half-and-half – $0.08.
Sugar-free vanilla syrup – $0.30.
Pure vanilla extract – $0.08.
Ice – $0.02.
Estimated Total Recipe Cost
Approximately $1.03 USD.
Estimated Cost Per Serving
Approximately $1.03 USD per serving.
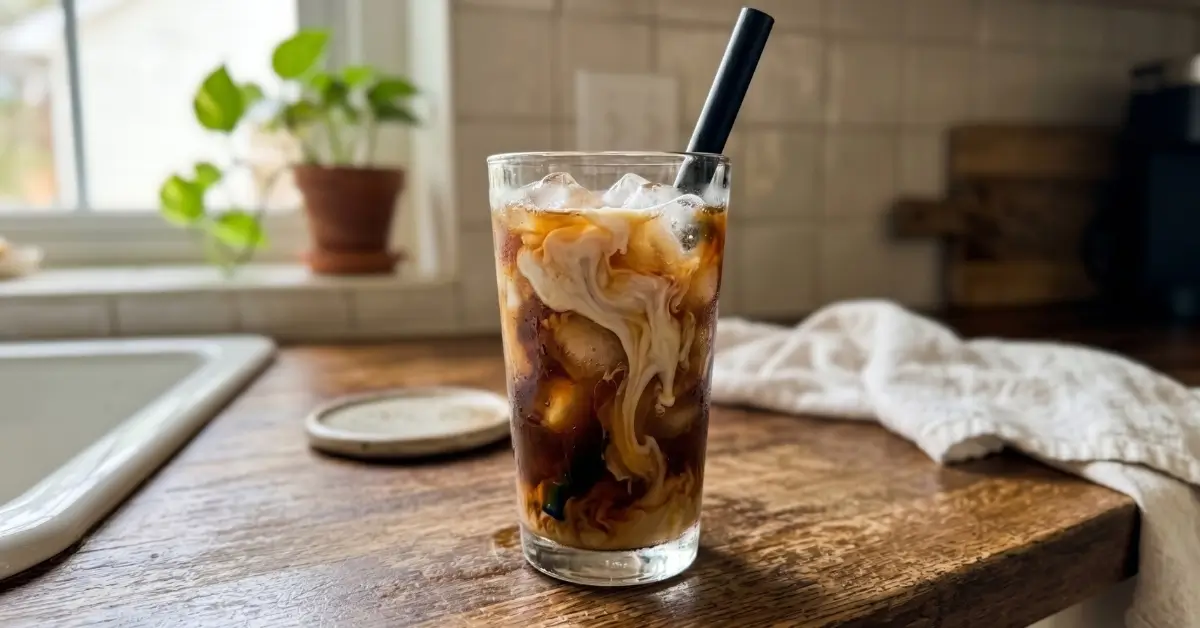
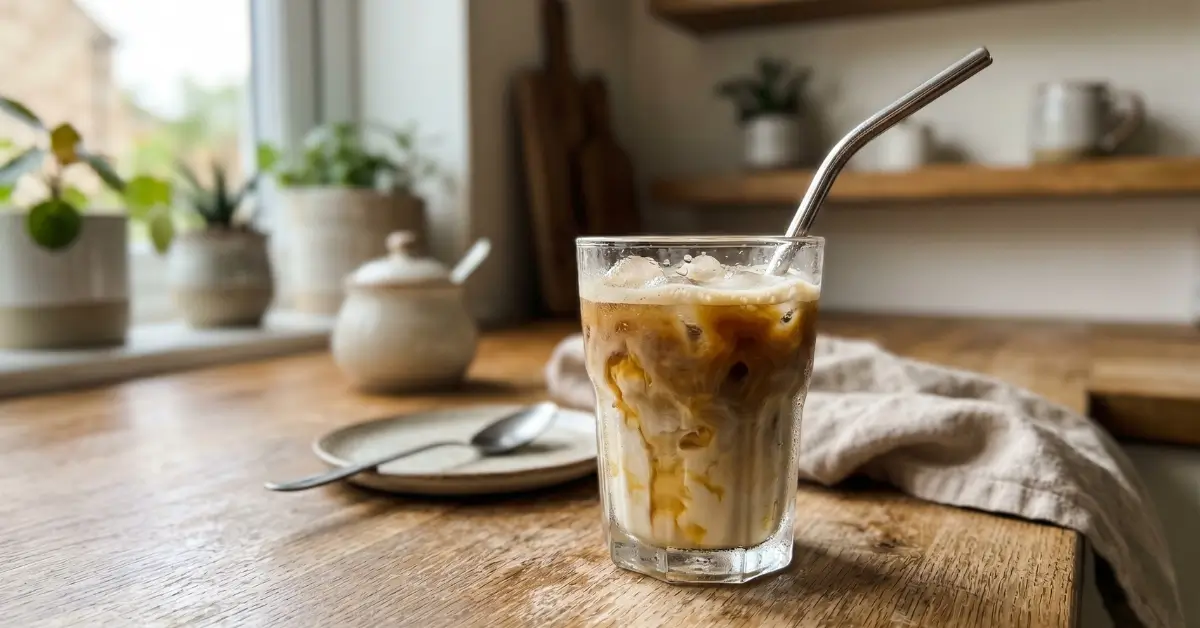
2. Low-Calorie Caramel Cold Brew Delight
Ingredients
Main Ingredients
- 1 cup cold brew coffee, chilled.
- 1/2 cup unsweetened vanilla almond milk.
- 1 tablespoon sugar-free caramel syrup.
- 1/2 teaspoon pure vanilla extract.
- 1 to 2 teaspoons zero-calorie sweetener, such as monk fruit or stevia, adjusted to taste.
- 1 cup ice cubes.
- Pinch of fine sea salt.
Optional Ingredients
- 1 tablespoon light whipped topping for a creamy finish.
- 1 teaspoon sugar-free caramel sauce for drizzling.
- 1/4 teaspoon ground cinnamon for a warm flavor.
- 1 tablespoon sugar-free vanilla coffee creamer for extra richness.
- 1 teaspoon unsweetened cocoa powder for a caramel mocha variation.
- Extra cold brew coffee ice cubes to prevent dilution.
Ingredient Substitutions
- Cold brew coffee: Use chilled strong brewed coffee if you don’t have cold brew. The flavor will be slightly more acidic, but it still works.
- Unsweetened vanilla almond milk: Substitute unsweetened oat milk, cashew milk, skim milk, or another lower-calorie milk. Keep in mind that oat milk usually adds more calories and carbohydrates.
- Sugar-free caramel syrup: Regular caramel syrup can be used, but it will significantly increase the sugar and calorie content.
- Zero-calorie sweetener: Use monk fruit, stevia, sucralose, or your preferred low-calorie sweetener. You can also skip it if your caramel syrup is sweet enough.
- Vanilla extract: Almond extract can work in a very small amount, about 1/8 teaspoon, but it creates a noticeably different flavor.
Equipment Needed
- 16-ounce drinking glass or mason jar.
- Liquid measuring cup.
- Measuring spoons.
- Long-handled spoon or reusable straw.
- Small spoon for stirring the caramel mixture.
- Ice cube tray.
- Refrigerator for chilling the coffee.
- Optional milk frother.
- Optional cocktail shaker or tightly sealed mason jar.
- Optional squeeze bottle for caramel drizzle.
Step-by-Step Instructions
1. Chill the Cold Brew
Start with 1 cup of fully chilled cold brew coffee. For the best flavor, the coffee should be refrigerator-cold, ideally around 35°F to 40°F.
If your cold brew is already chilled, you can move directly to the next step. If you are using freshly brewed coffee as a substitute, let it cool to room temperature first, then refrigerate until cold.
The coffee should be completely cool with no visible steam.
Strong cold brew works best because the ice and almond milk naturally soften the coffee flavor.
Don’t pour hot coffee directly over ice. It melts the ice quickly, waters down the drink, and can leave you with weak, lukewarm coffee.
2. Mix the Caramel Flavor Base
1 tablespoon sugar-free caramel syrup.
1/2 teaspoon vanilla extract.
1 to 2 teaspoons zero-calorie sweetener.
A tiny pinch of sea salt.
Stir for about 15 to 20 seconds.
This small step matters more than you might think. Mixing the flavor ingredients first helps distribute the caramel and sweetener evenly instead of leaving a concentrated layer at the bottom.
The mixture should look smooth and evenly blended.
Too much salt can overpower the caramel. Use only a tiny pinch.
3. Add the Cold Brew Coffee
Pour 1 cup chilled cold brew coffee into the glass with the caramel mixture.
Stir for 15 to 20 seconds, making sure your spoon reaches the bottom of the glass.
The coffee should have a consistent dark brown color with no obvious streaks of syrup sitting at the bottom.
Taste the coffee now, before adding milk. If it seems too bitter, add a little more sweetener. If it tastes overly sweet, add 1 to 2 tablespoons more cold brew.
4. Add the Ice
Fill the glass with about 1 cup of ice cubes.
For the strongest coffee flavor, use large ice cubes or frozen coffee cubes. Smaller pieces of ice melt faster and can dilute the drink.
The glass should be mostly filled with ice while leaving enough room for the milk.
Don’t add melting or partially melted ice from a warm container. Fresh, solid ice keeps the drink colder longer.
5. Pour in the Almond Milk
Slowly pour 1/2 cup unsweetened vanilla almond milk over the cold brew.
For a layered coffee-shop appearance, pour it gently over the back of a spoon. For an evenly creamy drink, simply pour it in and stir.
Before stirring, you should see light ribbons of milk moving through the dark coffee. After stirring, the drink should become a smooth, creamy light brown.
If your almond milk has separated in the carton, shake it well before measuring.
6. Stir, Shake, or Froth
Stir the drink for about 20 seconds until everything is evenly combined.
For a frothier texture, froth 2 to 3 tablespoons of the almond milk separately and spoon it over the finished drink. You can also shake the coffee mixture in a tightly sealed mason jar for 10 to 15 seconds before pouring it over ice.
The finished drink should look evenly blended, cold, and lightly creamy. A frothed version will have a thin layer of tiny bubbles on top.
Never shake hot coffee in a sealed container. This recipe uses chilled coffee only.
7. Add Optional Toppings and Serve
1 tablespoon light whipped topping.
1 teaspoon sugar-free caramel drizzle.
A light dusting of cinnamon.
Serve immediately while the drink is very cold.
Best serving temperature: Approximately 35°F to 40°F.
The finished cold brew should be creamy light brown with plenty of solid ice remaining in the glass.
Give the drink one more stir after a few minutes because some sugar-free syrups and milk alternatives can settle slightly.
Nutrition Facts
Cost To Make This Recipe
Item – Estimated Cost (USD).
1 cup cold brew coffee – $0.80.
1/2 cup unsweetened vanilla almond milk – $0.35.
1 tablespoon sugar-free caramel syrup – $0.30.
1/2 teaspoon vanilla extract – $0.15.
Zero-calorie sweetener – $0.10.
Pinch of sea salt – $0.01.
Ice – $0.04.
Estimated Total Recipe Cost
Approximately $1.75 USD.
Estimated Cost Per Serving
Approximately $1.75 USD per serving.
3. Sugar-Free Mocha Protein Iced Coffee
Ingredients
Main Ingredients
- 1 cup cold brew coffee or strongly brewed coffee, chilled.
- Cold brew gives the drink a smooth, less bitter flavor. Regular brewed coffee works too, but chill it completely before using.
- 1/2 cup unsweetened almond milk.
- Adds creaminess without much sugar. You can substitute unsweetened oat milk, unsweetened soy milk, skim milk, or another milk you enjoy.
- 1 scoop chocolate protein powder, about 1 ounce.
- Use a sugar-free or no-added-sugar chocolate protein powder. Whey protein usually blends smoothly, while a plant-based protein powder may make the drink slightly thicker.
- 1 tablespoon unsweetened cocoa powder.
- Gives the coffee a deeper mocha flavor. Natural cocoa powder works well. Dutch-process cocoa can be used for a darker, smoother chocolate taste.
- 1 to 2 teaspoons sugar-free sweetener, to taste.
- Use a granulated monk fruit blend, stevia blend, erythritol blend, or another coffee-friendly sugar substitute. Check the package because sweetness levels vary significantly between products.
- 1/4 teaspoon pure vanilla extract.
- Softens the bitterness of the coffee and cocoa.
- 1 cup ice cubes.
- Use fresh, solid ice for the best cold texture.
- Pinch of fine salt.
- A tiny amount helps balance the bitterness of unsweetened cocoa. Do not add too much.
Optional Ingredients
- 1 tablespoon sugar-free chocolate syrup for a sweeter, more dessert-like mocha.
- 1 to 2 tablespoons sugar-free whipped topping for serving.
- 1/4 teaspoon ground cinnamon for a warm flavor.
- 1/8 teaspoon instant espresso powder for stronger coffee flavor.
- 1 tablespoon heavy cream for extra richness.
- 1 tablespoon powdered peanut butter for a chocolate-peanut flavor.
- 1/8 teaspoon peppermint extract for a peppermint mocha variation, but use sparingly.
Ingredient Substitutions
- If you do not have cold brew, use 1 cup strongly brewed coffee that has been fully chilled. Avoid pouring hot coffee directly over the ice because it quickly waters down the drink.
- For a dairy-free Sugar-Free Mocha Protein Iced Coffee, choose unsweetened almond, soy, or oat milk and use a dairy-free protein powder.
- If you only have vanilla protein powder, use it and increase the unsweetened cocoa powder to 1 1/2 tablespoons for a stronger chocolate taste.
- If your protein powder is already very sweet, reduce or completely skip the additional sugar-free sweetener.
Equipment Needed
- High-speed blender or personal blender.
- Liquid measuring cup.
- Tablespoon measuring spoon.
- Teaspoon measuring spoon.
- Tall 16- to 20-ounce drinking glass.
- Long spoon or reusable straw.
- Small bowl or coffee mug.
- Small whisk or fork.
- Coffee maker, cold brew maker, or French press if preparing coffee from scratch.
- Ice cube tray, if needed.
Step-by-Step Instructions
1. Prepare and Chill the Coffee
Start with 1 cup cold brew coffee or strongly brewed coffee that has been completely chilled.
If you are brewing fresh coffee, make it slightly stronger than usual because the milk and ice will dilute the flavor. Let the coffee cool briefly, then refrigerate it until cold.
The coffee should feel fully cold when you touch the outside of the container.
Brew the coffee the night before and refrigerate it in a covered container. This makes morning preparation much faster.
Do not pour steaming coffee directly over ice. The ice will melt quickly and leave you with weak, watery protein coffee.
2. Make a Smooth Cocoa Mixture
Place 1 tablespoon unsweetened cocoa powder in a small bowl or mug. Add about 2 tablespoons of the cold coffee and whisk with a fork or small whisk until mostly smooth.
At first, the cocoa may resist mixing. Keep stirring and press any dry pockets against the side of the bowl.
The mixture should look dark, glossy, and mostly free of visible dry cocoa lumps.
This quick cocoa paste is worth the extra minute. Dumping dry cocoa directly into cold liquid often creates floating clumps.
3. Add the Liquid Ingredients to the Blender
1/2 cup unsweetened almond milk.
Prepared cocoa mixture.
1/4 teaspoon vanilla extract.
1 to 2 teaspoons sugar-free sweetener.
Pinch of salt.
Blend for about 5 seconds to combine.
The liquid should have an even chocolate-brown color with no obvious streaks of cocoa.
Be careful with concentrated liquid sweeteners. A few extra drops of some stevia products can make the drink unpleasantly sweet or bitter.
4. Blend in the Protein Powder
Add 1 scoop chocolate protein powder to the blender. Secure the lid tightly and blend on medium-high speed for 15 to 25 seconds.
Stop as soon as the drink looks smooth.
The mixture should be creamy and evenly blended. A thin layer of foam on top is completely normal.
Adding the liquid before the protein powder helps prevent powder from sticking underneath the blender blades.
Do not blend for several minutes. Excessive blending can create too much foam and make some protein powders taste chalkier.
5. Taste and Adjust
Taste a small spoonful before adding ice.
If the drink tastes too bitter, add a little more sugar-free sweetener. If the chocolate flavor seems weak, add another 1 teaspoon cocoa powder and blend again. For stronger coffee flavor, add 1/8 teaspoon instant espresso powder.
Remember that ice slightly softens the flavor, so the mocha mixture should taste a little bold at this stage.
6. Fill the Glass With Ice
Add 1 cup ice cubes to a tall 16- to 20-ounce glass.
For a stronger drink that stays flavorful longer, you can freeze leftover coffee in an ice cube tray and use coffee cubes instead of regular ice.
The glass should be roughly half to two-thirds full of ice, depending on cube size.
7. Pour and Serve Immediately
Slowly pour the blended mocha protein coffee over the ice. Stir once or twice with a long spoon or straw.
Add sugar-free whipped topping, a small drizzle of sugar-free chocolate syrup, or a light dusting of cocoa powder if desired.
Serve the Sugar-Free Mocha Protein Iced Coffee immediately while it is cold and creamy.
Common mistake to avoid: Do not let the finished drink sit for a long time before serving. Ice dilution and natural protein separation can change the texture.
No-Blender Method
If you do not have a blender, add the chilled coffee, milk, cocoa mixture, protein powder, vanilla, sweetener, and salt to a large shaker bottle.
Shake vigorously for 30 to 45 seconds, or until smooth. Let the foam settle for about 20 seconds, then pour over ice.
Never shake hot coffee in a tightly sealed bottle. Pressure can build inside the container and cause hot liquid to spray when opened.
Nutrition Facts
Cost To Make This Recipe
Item – Estimated Cost (USD).
Cold brew coffee or brewed coffee – $0.60.
Unsweetened almond milk – $0.25.
Chocolate protein powder – $1.20.
Unsweetened cocoa powder – $0.15.
Sugar-free sweetener – $0.10.
Vanilla extract – $0.08.
Salt and ice – $0.02.
Estimated Total Recipe Cost
Approximately $2.40 USD.
Estimated Cost Per Serving
Approximately $2.40 USD per serving.
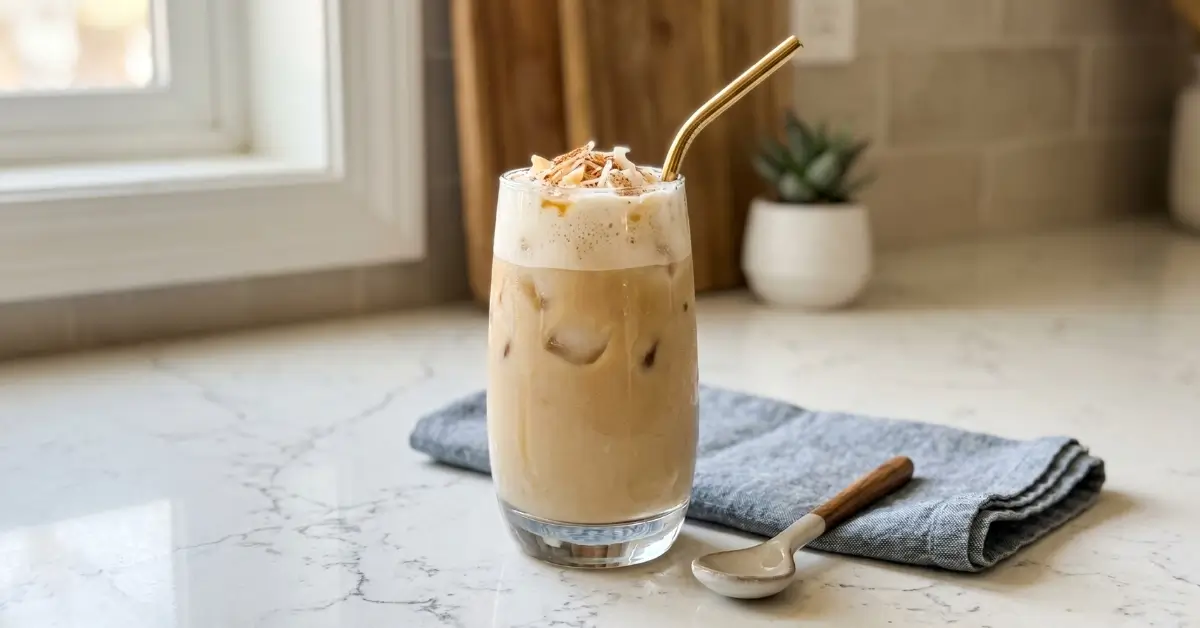
4. Almond Milk Honey Iced Latte (Under 100 Calories)
Ingredients
Main Ingredients
- 2 shots espresso, about 2 ounces – Freshly brewed espresso gives the latte its bold coffee flavor.
- 3/4 cup unsweetened almond milk – Use plain or unsweetened vanilla almond milk.
- 2 teaspoons honey – Adds natural sweetness while helping keep the drink under 100 calories.
- 1 to 1 1/2 cups ice cubes – Enough to fill a 12 to 16-ounce glass.
- 1 tablespoon hot water – Helps dissolve the honey evenly.
Optional Ingredients
- 1/8 teaspoon pure vanilla extract – Adds a soft coffee-shop-style vanilla note.
- Pinch of ground cinnamon – Great for a warm, lightly spiced finish.
- Pinch of sea salt – Can balance bitterness if your espresso tastes especially strong.
- Extra cinnamon for garnish – Adds aroma without meaningfully changing the calorie count.
Ingredient Substitutions
- Espresso substitute: Use 1/2 cup strongly brewed coffee, cooled before assembling the drink. The flavor will be milder and the finished latte slightly less creamy because of the extra liquid.
- Almond milk substitute: Unsweetened oat milk, cashew milk, or skim milk can work, but the total calories may change.
- Honey substitute: Pure maple syrup or agave nectar can be used in the same general amount. Flavor and nutrition will vary.
- Fresh espresso substitute: Instant espresso powder works well for a quick homemade version. Prepare it according to the package directions and use about 2 ounces.
Check the almond milk label before making the recipe. Unsweetened almond milk often varies by brand, so using a sweetened version may push the latte above 100 calories.
Equipment Needed
- Espresso machine, moka pot, or another method for making strong coffee.
- 12 to 16-ounce drinking glass.
- Liquid measuring cup.
- Measuring spoons.
- Small heat-safe cup or bowl.
- Long-handled spoon.
- Milk frother, optional.
- Reusable straw, optional.
Step-by-Step Instructions
1. Prepare the Glass and Ice
Fill a 12 to 16-ounce glass with 1 to 1 1/2 cups of ice cubes. The glass should look about two-thirds to three-quarters full.
Using plenty of ice matters because it chills the latte quickly and helps prevent the drink from tasting lukewarm.
The ice should sit high enough in the glass to keep the almond milk and espresso cold as soon as they are added.
Do not use a glass that is too small. Once the espresso and almond milk are added, the drink can easily overflow.
2. Dissolve the Honey
Add 2 teaspoons honey and 1 tablespoon hot water to a small heat-safe cup. Stir for about 15 to 20 seconds, or until the honey loosens into a thin syrup.
This simple step is important. Honey does not dissolve easily in very cold almond milk, so adding it directly over ice can leave a sticky layer at the bottom.
The mixture is ready when it looks smooth, glossy, and pourable with no thick blob of honey remaining.
If you are using freshly brewed hot espresso, you can stir the honey directly into the espresso instead of using hot water. This gives the latte a slightly stronger coffee flavor.
3. Brew the Espresso
Brew 2 shots of espresso, about 2 ounces total.
For the best flavor, use freshly brewed espresso with a strong aroma and a balanced roast. Medium or dark roast coffee works especially well with honey and almond milk.
No specific oven or stovetop temperature is required for this recipe. If heating water manually for coffee, aim for approximately 195°F to 205°F, which is a useful brewing range for many coffee methods.
Fresh espresso should look dark and concentrated, ideally with a light golden-brown crema on top when made with an espresso machine.
Do not use weak regular coffee in the same 2-ounce quantity. Once mixed with almond milk and ice, weak coffee can taste washed out.
4. Sweeten the Espresso
Stir the prepared honey mixture into the hot espresso. Add 1/8 teaspoon vanilla extract now if using.
Stir until completely combined.
You should not see thick honey collecting at the bottom of the cup.
Taste the espresso mixture before assembling the latte. It will taste stronger and sweeter than the final drink because the almond milk and ice have not been added yet.
5. Add the Almond Milk
Pour 3/4 cup unsweetened almond milk over the prepared ice.
For a slightly frothy texture, use a handheld milk frother for 10 to 15 seconds before pouring. Cold almond milk does not create the same dense foam as dairy milk, but a little aeration can make the latte feel smoother.
The almond milk should look cold, creamy, and evenly distributed around the ice.
Avoid sweetened almond milk unless you have checked the nutrition label. The added sugar can significantly increase the calories.
6. Pour in the Honey Espresso
Slowly pour the sweetened espresso over the almond milk and ice.
For a layered coffee-shop appearance, pour gently over the back of a spoon. For the best overall flavor, simply pour it in and stir.
Before stirring, you may see dark espresso ribbons moving through the pale almond milk.
7. Stir and Serve Immediately
Stir the Almond Milk Honey Iced Latte (Under 100 Calories) for about 10 to 15 seconds, making sure the honey, espresso, and almond milk are evenly combined.
Add a small pinch of cinnamon on top if desired.
Serve immediately while the ice is still firm and the coffee flavor is fresh.
The finished latte should have an even light tan color with no honey settled at the bottom.
Do not let hot espresso sit over the ice for several minutes before drinking. Excessive melting can dilute the coffee and weaken the flavor.
Nutrition Facts
Cost To Make This Recipe
Item – Estimated Cost (USD).
2 shots espresso – $0.55.
3/4 cup unsweetened almond milk – $0.40.
2 teaspoons honey – $0.20.
Ice and water – $0.03.
Optional vanilla or cinnamon – $0.05.
Estimated Total Recipe Cost
Approximately $1.23 USD.
Estimated Cost Per Serving
Approximately $1.23 USD per serving.
5. Light Cinnamon Dolce Iced Coffee

Ingredients
For the Light Cinnamon Dolce Syrup
- 1/4 cup water.
- 2 tablespoons packed light brown sugar.
- 1/2 teaspoon ground cinnamon.
- 1/4 teaspoon pure vanilla extract.
- Tiny pinch of salt.
For the Iced Coffee
- 1 1/2 cups strongly brewed coffee, chilled.
- 1 cup ice cubes, plus more as needed.
- 1/2 cup unsweetened almond milk.
- 2 tablespoons light cinnamon dolce syrup, divided.
Optional Ingredients
- 2 tablespoons light whipped cream for topping.
- 1/8 teaspoon ground cinnamon for garnish.
- 1 to 2 teaspoons zero-calorie sweetener for extra sweetness.
- 1 cinnamon stick for garnish.
- 1 tablespoon sugar-free vanilla syrup for a sweeter coffee-shop flavor.
Ingredient Substitutions
- Unsweetened almond milk: Use skim milk, 1% milk, unsweetened oat milk, or another light milk alternative. Keep in mind that oat milk usually adds more calories and carbohydrates.
- Light brown sugar: Dark brown sugar works too, but it creates a deeper molasses flavor.
- Strong brewed coffee: Cold brew concentrate diluted to taste works well. You can also use 2 shots of espresso plus 1 cup cold water.
- Ground cinnamon: Use a good-quality cinnamon for the cleanest flavor. Avoid adding too much because excess cinnamon can make the drink gritty.
- Vanilla extract: Vanilla bean paste can be used in a very small amount, although it may slightly change the texture and cost.
Equipment Needed
- Coffee maker, pour-over brewer, or French press.
- Measuring cups.
- Measuring spoons.
- Small saucepan.
- Whisk or small silicone spoon.
- Heat-safe bowl or glass jar.
- Fine-mesh strainer, optional.
- 2 tall serving glasses, about 12 to 16 ounces each.
- Long-handled spoon.
- Refrigerator.
- Ice cube tray, if making fresh ice.
Step-by-Step Instructions
1. Brew the Coffee Strong
Brew 1 1/2 cups of strong coffee using your preferred method. For the best flavor, use slightly more coffee grounds than you would for a normal cup.
Transfer the brewed coffee to a heat-safe container and allow it to cool for about 10 minutes at room temperature. Then refrigerate until chilled.
The coffee is ready to use when it is cool and no longer gives off visible steam.
If you are short on time, pour the coffee into a shallow container before refrigerating. The larger surface area helps it cool faster.
Do not pour piping-hot coffee directly over a full glass of ice. The ice melts quickly, leaving you with weak and watery iced coffee.
2. Start the Light Cinnamon Dolce Syrup
1/4 cup water.
2 tablespoons packed light brown sugar.
1/2 teaspoon ground cinnamon.
Tiny pinch of salt.
Place the saucepan over medium-low heat.
Whisk gently for about 1 to 2 minutes as the mixture warms. The goal is to dissolve the brown sugar evenly without aggressively boiling the syrup.
The syrup should look glossy and slightly darker, with no visible clumps of brown sugar.
High heat can reduce the syrup too quickly and make it overly thick or slightly bitter.
3. Gently Simmer the Syrup
Once the sugar has dissolved, allow the mixture to reach a very gentle simmer. Cook for another 2 to 3 minutes, whisking occasionally.
You should see small bubbles forming around the edges of the saucepan. A hard rolling boil is not necessary.
The syrup may still look fairly thin while hot. That is normal. It thickens slightly as it cools.
Ground cinnamon does not fully dissolve in liquid. Keep whisking so it stays evenly distributed rather than forming dry clumps.
4. Add the Vanilla
Remove the saucepan from the heat. Stir in 1/4 teaspoon pure vanilla extract.
Adding vanilla after removing the pan from the heat helps preserve its aroma and prevents the flavor from becoming flat.
Let the syrup cool for 10 to 15 minutes.
The finished syrup should be pourable, lightly glossy, and smell strongly of cinnamon and vanilla.
Do not cook the syrup until it becomes as thick as pancake syrup. A thick syrup will not blend easily into cold coffee.
5. Prepare the Glasses
Divide 1 cup of ice cubes between two tall glasses.
For a stronger drink, fill each glass generously with large ice cubes. Larger cubes melt more slowly than small crushed ice.
Coffee ice cubes are a great option if you make iced coffee often. Freeze leftover brewed coffee in an ice cube tray and use those cubes instead of regular ice.
6. Add the Chilled Coffee
Pour 3/4 cup chilled strong coffee into each glass.
Leave some room at the top for almond milk and syrup.
The coffee should remain dark and concentrated rather than immediately becoming pale or watery.
7. Add the Cinnamon Dolce Syrup
Add 1 tablespoon of cooled cinnamon dolce syrup to each glass.
Stir thoroughly for 10 to 15 seconds, making sure the syrup does not settle at the bottom.
Taste before adding extra sweetener. The brown sugar already provides noticeable sweetness.
Adding too much syrup can overpower the coffee and remove the “light” quality of the drink.
8. Pour in the Milk
Add 1/4 cup unsweetened almond milk to each glass.
Pour it slowly for a pretty layered appearance, or stir immediately for a smooth, creamy drink.
After stirring, the coffee should turn a light caramel-brown color.
If using skim milk or another substitute, add it gradually. Different milks vary in richness and sweetness.
9. Taste and Adjust
Stir the Light Cinnamon Dolce Iced Coffee well and take a sip.
For more sweetness, add a small amount of zero-calorie sweetener. For stronger coffee flavor, add a splash of chilled coffee. For extra creaminess, add another tablespoon of almond milk.
Make small adjustments rather than adding large amounts at once.
10. Garnish and Serve Immediately
If desired, top each glass with 1 tablespoon light whipped cream and a very light dusting of cinnamon.
Serve immediately while the drink is cold and the ice is still solid.
The finished iced coffee should look creamy and light brown with tiny cinnamon specks throughout. It should taste balanced, with coffee coming through first, followed by gentle brown sugar, cinnamon, and vanilla notes.
Nutrition Facts
Cost To Make This Recipe
Item – Estimated Cost (USD).
Strong brewed coffee – $0.70.
Unsweetened almond milk – $0.35.
Light brown sugar – $0.10.
Ground cinnamon – $0.05.
Vanilla extract – $0.15.
Salt and ice – $0.05.
Estimated Total Recipe Cost
Approximately $1.40 USD.
Estimated Cost Per Serving
Approximately $0.70 USD per serving.
6. Coconut Vanilla Iced Coffee Refresher
Ingredients
Main Ingredients
- 1 1/2 cups strong brewed coffee, fully chilled.
- Medium or dark roast works especially well because the coffee flavor stays noticeable after adding ice and coconut milk.
- 1 cup unsweetened refrigerated coconut milk beverage.
- Use the pourable kind sold in cartons for a lighter, smoother drink. Avoid full-fat canned coconut milk unless you want a much richer texture.
- 2 tablespoons pure maple syrup.
- Adds gentle sweetness without overpowering the coffee.
- 1 teaspoon pure vanilla extract.
- Gives the Coconut Vanilla Iced Coffee Refresher its warm vanilla flavor.
- 1 1/2 to 2 cups ice cubes.
- Use enough to completely chill both servings.
- 1/8 teaspoon fine sea salt.
- Optional in taste, but useful for balancing bitterness and bringing out the vanilla.
Optional Ingredients
- 2 tablespoons coconut cream for a richer, creamier texture.
- 1 to 2 tablespoons toasted unsweetened coconut flakes for garnish.
- 1/4 teaspoon coconut extract for stronger coconut flavor.
- 1/4 teaspoon ground cinnamon for a warm finish.
- 1 extra tablespoon maple syrup for a sweeter coffee shop-style drink.
- 2 shots espresso, chilled for a stronger caffeine boost.
Ingredient Substitutions
- Coffee: Substitute 1 1/2 cups prepared cold brew coffee. If using concentrated cold brew, dilute it according to the package directions first.
- Coconut milk beverage: Use oat milk, almond milk, or regular dairy milk. The drink will still work, but the coconut flavor will be weaker.
- Maple syrup: Substitute honey, agave nectar, or 1 to 2 tablespoons simple syrup. Honey may not dissolve as easily in very cold liquid.
- Vanilla extract: Use 1 tablespoon vanilla syrup, then reduce the maple syrup to avoid making the drink overly sweet.
- Sea salt: Regular fine table salt works, but use only a very small pinch.
Equipment Needed
- Coffee maker, pour-over brewer, or French press.
- Liquid measuring cup.
- Measuring tablespoons.
- Measuring teaspoon.
- Small pitcher or large glass measuring cup.
- Long-handled spoon or small whisk.
- 2 tall drinking glasses, about 12 to 16 ounces each.
- Refrigerator-safe container for chilling coffee.
- Ice cube tray, if making fresh ice.
- Fine-mesh strainer, optional if your brewed coffee contains sediment.
- Blender, optional for a frothier texture.
Step-by-Step Instructions
1. Brew the Coffee Strong
Brew 1 1/2 cups of strong coffee using your preferred method. A medium-dark or dark roast gives the best balance because coconut milk and ice naturally soften the coffee flavor.
If you are brewing hot coffee specifically for this recipe, use slightly more ground coffee than you normally would. The finished coffee should taste bold but not burnt.
The brewed coffee should look deep brown and smell rich and roasted.
Do not use weak coffee. Once the ice begins melting, weak coffee can quickly taste watery.
Never pour piping-hot coffee directly over a full glass of ice if you want a smooth, flavorful refresher. The ice will melt too fast and dilute the drink.
2. Chill the Coffee Completely
Transfer the brewed coffee to a heat-safe container. Let it cool briefly at room temperature, then refrigerate for 30 to 60 minutes, or until fully cold.
For food safety and better flavor, do not leave brewed coffee sitting at room temperature for several hours.
The container should feel cold when touched, with no noticeable warmth remaining.
Brew the coffee the night before and refrigerate it in a covered container. This makes the Coconut Vanilla Iced Coffee Refresher a true 5-minute drink the next day.
3. Make the Coconut Vanilla Mixture
1 cup unsweetened coconut milk beverage.
2 tablespoons pure maple syrup.
1 teaspoon pure vanilla extract.
1/8 teaspoon fine sea salt.
Whisk or stir vigorously for 20 to 30 seconds.
The goal is to fully distribute the sweetener and vanilla throughout the coconut milk.
The mixture should look smooth and evenly blended, with no visible streaks of maple syrup at the bottom.
Coconut milk can naturally separate in the carton. Shake the carton well before measuring it.
4. Add the Chilled Coffee
Pour the 1 1/2 cups chilled coffee into the coconut vanilla mixture. Stir for another 15 to 20 seconds.
Taste a small spoonful before adding more sweetener. Cold drinks often taste less sweet than room-temperature mixtures, but adding too much syrup can hide the coffee flavor.
The drink should turn an even light-to-medium coffee brown, depending on the roast and coconut milk brand.
If the mixture tastes too strong, add 2 to 4 tablespoons more coconut milk. If it tastes too mild, add a small splash of cold brew concentrate.
5. Fill the Glasses With Ice
Divide 1 1/2 to 2 cups ice cubes between two tall glasses.
Fill each glass about two-thirds full with ice. Larger ice cubes are ideal because they melt more slowly than crushed ice.
Avoid using old freezer ice that has absorbed food odors. Coffee drinks pick up those flavors surprisingly fast.
6. Pour and Finish the Refresher
Divide the coconut vanilla coffee mixture evenly between the two ice-filled glasses.
Stir each glass gently for 5 to 10 seconds.
For a richer finish, drizzle 1 tablespoon coconut cream into each glass. For extra coconut flavor, sprinkle a little toasted unsweetened coconut on top.
The finished Coconut Vanilla Iced Coffee Refresher should look cold, lightly creamy, and evenly mixed. Small swirls of coconut cream are completely fine if you use the optional topping.
Serve immediately for the freshest flavor and least dilution.
Blend the coffee mixture without ice for 10 to 15 seconds, then pour it over fresh ice. Do not overblend, or the drink can become too foamy.
Nutrition Facts
Cost To Make This Recipe
Item – Estimated Cost (USD).
Strong brewed coffee – $0.70.
Unsweetened coconut milk beverage – $0.65.
Pure maple syrup – $0.60.
Pure vanilla extract – $0.25.
Sea salt – $0.01.
Ice – $0.04.
Estimated Total Recipe Cost
Approximately $2.25 USD.
Estimated Cost Per Serving
Approximately $1.13 USD per serving.
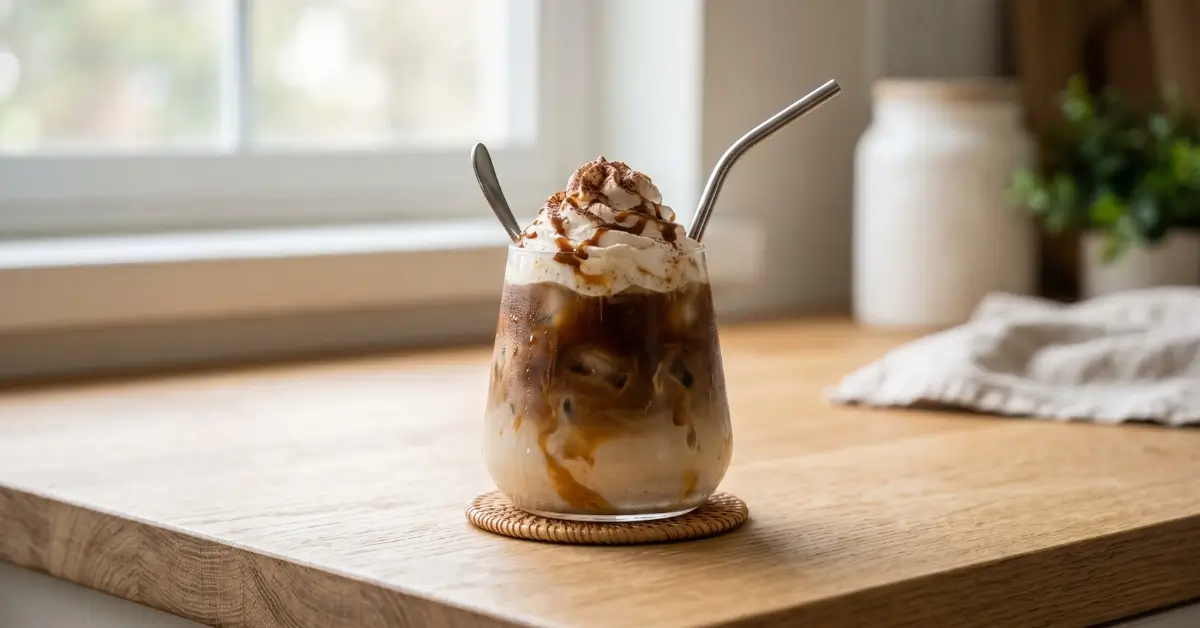
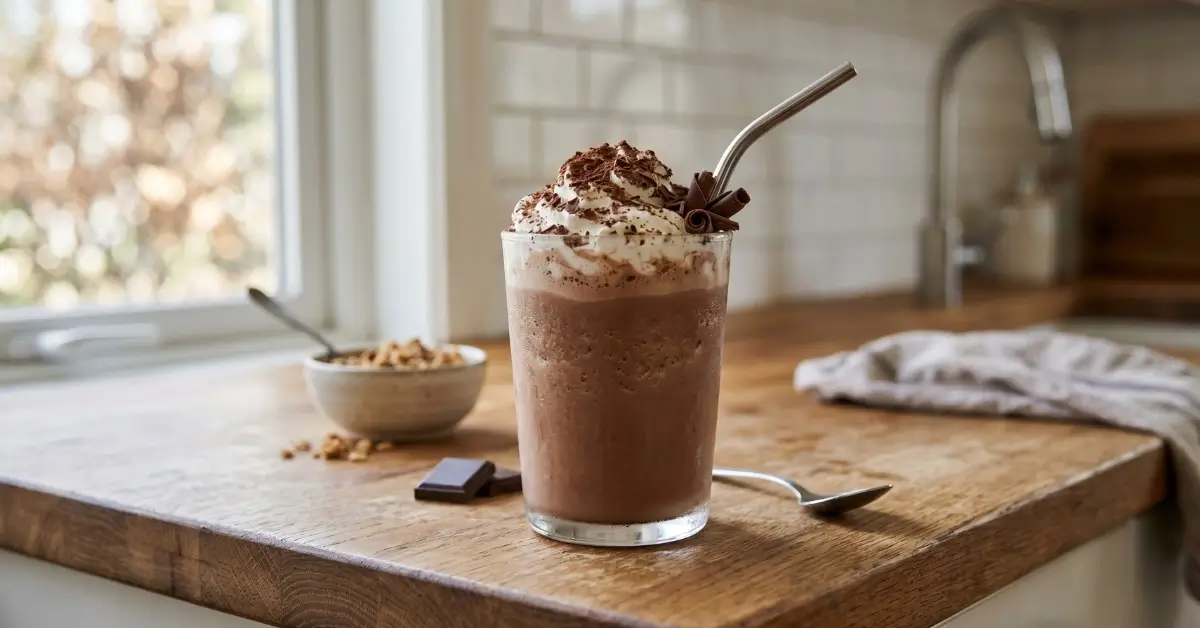
7. High-Protein Chocolate Iced Coffee Shake
Ingredients
Main Ingredients
- 3/4 cup strong brewed coffee, fully chilled – Cold brew coffee also works well and usually gives the shake a smoother, less bitter flavor.
- 1/2 cup 2% milk – Whole milk makes a richer shake, while skim milk lowers the calories. Unsweetened almond milk or oat milk can also be used.
- 1 scoop chocolate protein powder, about 1 ounce – Whey, casein, or a plant-based chocolate protein powder will work. Choose a brand you already enjoy because its flavor makes a big difference.
- 1/3 cup plain nonfat Greek yogurt – Adds creaminess and extra protein. Substitute vanilla Greek yogurt for a sweeter flavor.
- 1 tablespoon unsweetened cocoa powder – Deepens the chocolate flavor. Dutch-process cocoa powder can be used for a smoother, darker chocolate taste.
- 1 to 2 teaspoons maple syrup or honey – Adjust to taste. A zero-calorie sweetener may be substituted.
- 1/2 teaspoon pure vanilla extract – Softens the stronger coffee and cocoa flavors.
- 1 cup ice cubes – Use slightly less ice for a thinner shake or more for a thicker, frostier texture.
- 1 small pinch kosher salt – Optional in practice, but highly recommended because it makes the chocolate flavor taste fuller.
Optional Ingredients
- 1/2 frozen medium banana – Adds natural sweetness and creates a thicker, creamier texture.
- 1 tablespoon peanut butter or almond butter – Adds richness, healthy fats, and a little extra protein.
- 1/4 teaspoon ground cinnamon – Gives the shake a warm mocha-style flavor.
- 1 teaspoon chia seeds – Adds fiber and slightly thickens the drink.
- 1/4 teaspoon instant espresso powder – Useful when you want a stronger coffee kick.
- 1 tablespoon sugar-free chocolate syrup – For a more dessert-like chocolate flavor.
- 2 tablespoons light whipped cream – For serving.
- 1 teaspoon mini chocolate chips or dark chocolate shavings – For a simple topping.
Ingredient Substitutions
- If you do not have Greek yogurt, use 1/3 cup cottage cheese and blend very thoroughly. The flavor stays mild, and the shake remains high in protein.
- For a dairy-free version, use plant-based chocolate protein powder, unsweetened soy milk, and dairy-free yogurt. Soy milk is especially useful because it generally provides more protein than many almond or oat milk options.
- If you do not have chilled brewed coffee, mix 1 to 2 teaspoons instant coffee with 3/4 cup cold water. Stir until completely dissolved before blending.
Equipment Needed
- High-speed blender or standard countertop blender.
- Liquid measuring cup.
- Tablespoon measuring spoon.
- Teaspoon measuring spoon.
- Coffee maker, cold brew setup, or instant coffee cup.
- Small spoon for measuring and stirring.
- Tall 16 to 20-ounce drinking glass.
- Reusable straw, optional.
- Rubber spatula, optional for scraping down thick ingredients.
Step-by-Step Instructions
Step 1: Brew and Chill the Coffee
Prepare 3/4 cup strong coffee using your preferred brewing method. For the best flavor, make the coffee slightly stronger than you normally drink it because the milk, yogurt, protein powder, and ice will dilute it.
Cool the coffee completely before blending. You can refrigerate it for 20 to 30 minutes or use coffee prepared the night before.
The coffee should be fully cold with no visible steam.
If you are in a hurry, pour hot coffee into a separate cup and refrigerate it briefly before making the shake.
Do not pour piping-hot coffee directly over the ice in the blender. The ice will melt quickly and leave you with a thin, watery shake.
Step 2: Add the Liquid Ingredients First
Pour 3/4 cup chilled coffee and 1/2 cup milk into the blender.
Adding liquids first helps the blender blades move freely and prevents thick ingredients from getting stuck underneath the protein powder.
Next, add 1/3 cup Greek yogurt, 1 to 2 teaspoons maple syrup or honey, and 1/2 teaspoon vanilla extract.
The liquid ingredients should sit freely around the blender blades without large dry clumps.
Start with only 1 teaspoon of sweetener. You can always add more after tasting.
Step 3: Add the Chocolate and Protein Ingredients
Add 1 scoop chocolate protein powder, 1 tablespoon unsweetened cocoa powder, and a small pinch of kosher salt.
If using optional ingredients such as cinnamon, espresso powder, chia seeds, peanut butter, or frozen banana, add them now.
Cocoa powder can stick to the sides of a blender. Place it near the center rather than dumping it directly against the blender jar.
Do not add multiple scoops of protein powder just to increase the protein content. Too much powder can make the shake chalky, overly thick, and unpleasant.
Step 4: Add the Ice
Add 1 cup ice cubes on top of the other ingredients.
For a thick, milkshake-like texture, use the full cup. For a smoother and more drinkable iced coffee consistency, begin with 3/4 cup ice.
The ice should remain mostly above the liquid before blending.
Smaller ice cubes are easier on standard blenders than very large, solid cubes.
Step 5: Blend Until Smooth
Secure the blender lid firmly. Start on low speed for about 5 to 10 seconds, then increase to high speed and blend for another 25 to 40 seconds.
The exact blending time depends on your blender.
The finished shake should look evenly chocolate brown, creamy, and slightly frothy on top. You should not see large ice pieces, streaks of yogurt, or pockets of dry protein powder.
Over-blending can warm the shake and melt too much ice. Stop once the texture is smooth.
Step 6: Check the Consistency
Remove the lid and check the texture.
If the shake is too thick, add 1 to 2 tablespoons of milk or chilled coffee, then blend for 5 to 10 seconds.
If the shake is too thin, add a few more ice cubes or 2 to 3 tablespoons of frozen banana, then blend again.
A properly blended shake should pour smoothly but still have enough body to lightly coat the inside of the glass.
Step 7: Taste and Adjust
Taste a small spoonful before serving.
For more chocolate flavor, add another 1 teaspoon cocoa powder. For stronger coffee flavor, add a small pinch of instant espresso powder. If the shake tastes too bitter, add another 1 teaspoon maple syrup or honey.
Blend for 5 seconds after any adjustment.
Different chocolate protein powders vary a lot in sweetness. Always taste before adding extra sweetener.
Step 8: Serve Immediately
Pour the High-Protein Chocolate Iced Coffee Shake into a tall 16 to 20-ounce glass.
Add light whipped cream, chocolate shavings, cinnamon, or a small drizzle of chocolate syrup if desired. Serve immediately while the shake is cold and frosty.
For the best texture, do not let the finished drink sit at room temperature for long. The ice will melt and gradually thin the shake.
Nutrition Facts
Cost To Make This Recipe
Item – Estimated Cost (USD).
Strong brewed coffee – $0.35.
2% milk – $0.20.
Chocolate protein powder – $1.25.
Nonfat Greek yogurt – $0.45.
Unsweetened cocoa powder – $0.15.
Maple syrup or honey – $0.10.
Vanilla extract – $0.12.
Ice and kosher salt – $0.03.
Estimated Total Recipe Cost
Approximately $2.65 USD.
Estimated Cost Per Serving
Approximately $2.65 USD per serving.