10 High Protein Meals Under $5 Easy, Healthy, Budget Recipes
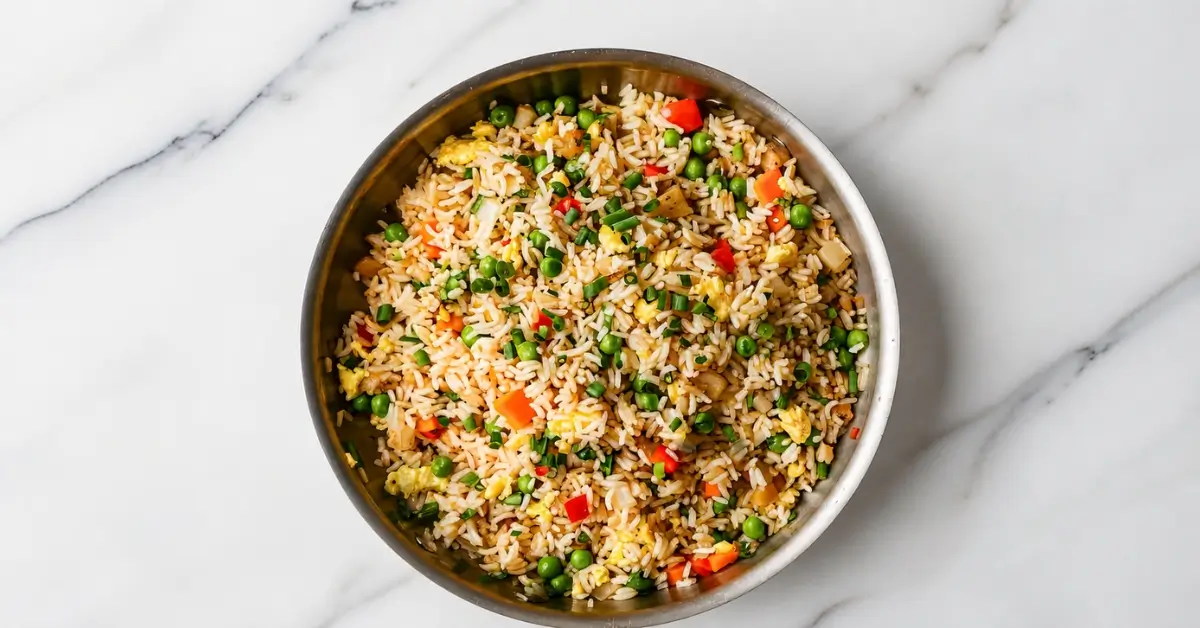
1. High Protein Egg Fried Rice
Ingredients
Main Ingredients
- 3 cups cold cooked long-grain white rice or jasmine rice.
- 12 ounces boneless, skinless chicken breast.
- 4 large eggs.
- 1 cup frozen peas and carrots.
- 3 green onions, thinly sliced.
- 3 cloves garlic, minced.
- 1 teaspoon fresh ginger, finely grated.
- 1 tablespoon avocado oil, divided.
- 1 teaspoon toasted sesame oil.
- 3 tablespoons reduced-sodium soy sauce.
- 1 teaspoon rice vinegar.
- 1/4 teaspoon ground black pepper.
Optional Ingredients
- 1 to 2 teaspoons sriracha for heat.
- 1 teaspoon chili crisp for a spicy finish.
- 1 tablespoon sesame seeds for garnish.
- Extra sliced green onions for serving.
- 1/2 cup shelled edamame for additional plant-based protein.
Ingredient Substitutions
- Rice: Use cooked brown rice instead of white or jasmine rice for more fiber and a slightly nutty flavor.
- Chicken breast: Substitute boneless, skinless chicken thighs, cooked turkey, lean pork, or extra-firm tofu.
- Soy sauce: Use tamari for a gluten-free option, but check the label to confirm all ingredients are gluten-free.
- Avocado oil: Canola oil, vegetable oil, or another neutral high-heat cooking oil works well.
- Fresh ginger: Substitute about 1/4 teaspoon ground ginger if fresh ginger is unavailable.
- Frozen vegetables: Use frozen mixed vegetables, chopped broccoli, corn, or diced bell peppers.
Equipment Needed
- Large nonstick skillet or wok.
- Cutting board.
- Sharp chef’s knife.
- Large mixing bowl.
- Small mixing bowl.
- Measuring cups.
- Measuring spoons.
- Whisk or fork.
- Wooden spoon or heat-safe spatula.
- Instant-read meat thermometer.
- Plate or clean bowl for holding cooked chicken.
Step-by-Step Instructions
1. Prepare the Ingredients
Cut the chicken breast into small 1/2-inch pieces. Try to keep the pieces similar in size so they cook evenly.
Pat the chicken dry with paper towels. Excess surface moisture can cause the chicken to steam instead of brown.
Break up the cold cooked rice with clean hands or a fork before cooking. Separate any large clumps.
In a small bowl, whisk together.
3 tablespoons reduced-sodium soy sauce.
1 teaspoon toasted sesame oil.
1 teaspoon rice vinegar.
1/4 teaspoon black pepper.
Keep the sauce nearby because fried rice cooks quickly once the skillet is hot.
Cold rice is strongly recommended. Fresh hot rice contains more surface moisture and can become mushy in the skillet.
2. Cook the Chicken
Heat a large skillet or wok over medium-high heat for about 1 to 2 minutes.
Add 2 teaspoons of the avocado oil. Once the oil looks thin and slightly shimmering, add the diced chicken in a single layer.
Cook for about 5 to 7 minutes, stirring occasionally. The chicken should develop light golden-brown spots and look opaque throughout.
Check the thickest piece with an instant-read thermometer. The internal temperature should reach 165°F.
Transfer the cooked chicken to a clean plate.
The chicken is ready when no pink remains inside and the outside has light golden edges.
Do not crowd the chicken into a small pan. Crowding creates excess steam and prevents proper browning.
3. Scramble the Eggs
Reduce the heat to medium. Add the remaining 1 teaspoon avocado oil if the skillet looks dry.
Crack the eggs into a bowl and whisk until the yolks and whites are fully combined.
Pour the eggs into the skillet. Let them sit for about 10 seconds, then gently push and fold them with a spatula.
Cook for about 1 to 2 minutes.
Stop cooking when the eggs are softly set but still slightly glossy. Break them into small bite-size pieces.
The eggs should look fluffy and just cooked, not dry or deeply browned.
Overcooking the eggs at this stage can make them rubbery after the remaining ingredients are added.
4. Add the Garlic, Ginger, and Vegetables
Push the scrambled eggs to one side of the skillet.
Add the minced garlic and grated ginger to the open area. Stir for about 20 to 30 seconds, just until fragrant.
Add the frozen peas and carrots. Cook for 2 to 3 minutes, stirring frequently.
The vegetables should be hot and tender but still colorful.
There is usually no need to thaw frozen peas and carrots first. Add them directly to the hot skillet.
Do not cook garlic until dark brown. Burned garlic can make the entire dish taste bitter.
5. Add the Cold Rice
Increase the heat to medium-high.
Add the cold cooked rice and immediately break apart any remaining clumps with a spatula.
Spread the rice across the skillet so as much of it as possible touches the hot surface. Cook for 3 to 4 minutes, stirring every 30 to 45 seconds rather than constantly.
This short contact with the hot skillet helps remove excess moisture and gives the rice a better fried texture.
The grains should look separate, hot, and lightly glossy. A few toasted spots are fine.
Constant stirring can prevent the rice from making enough contact with the skillet to develop good texture.
6. Return the Chicken and Add the Sauce
Return the cooked chicken and any juices from the plate to the skillet.
Pour the prepared sauce around the rice rather than dumping it all into one small spot. Toss everything together quickly.
Cook for 2 to 3 minutes over medium-high heat.
The High Protein Egg Fried Rice is ready when the chicken is fully reheated, the sauce is evenly distributed, and there is no excess liquid pooling at the bottom of the skillet.
Taste before adding extra soy sauce. Different brands vary considerably in saltiness.
7. Add the Green Onions and Serve
Turn off the heat.
Fold in most of the sliced green onions, saving a small amount for garnish.
Taste and adjust with a small splash of soy sauce, rice vinegar, or sriracha if desired.
Serve the High Protein Egg Fried Rice immediately while hot.
For meal prep, divide it into individual containers after cooking. Cool leftovers promptly and refrigerate them in shallow, covered containers.
Nutrition Facts
Cost To Make This Recipe
Item – Estimated Cost (USD).
3 cups cooked rice – $0.90.
12 oz chicken breast – $3.25.
4 large eggs – $1.35.
1 cup frozen peas and carrots – $0.85.
3 green onions – $0.45.
3 garlic cloves – $0.20.
Fresh ginger – $0.15.
Avocado oil – $0.20.
Toasted sesame oil – $0.15.
Reduced-sodium soy sauce – $0.35.
Rice vinegar – $0.10.
Black pepper – $0.05.
Estimated Total Recipe Cost
Approximately $8.00 USD.
Estimated Cost Per Serving
Approximately $2.00 USD per serving.
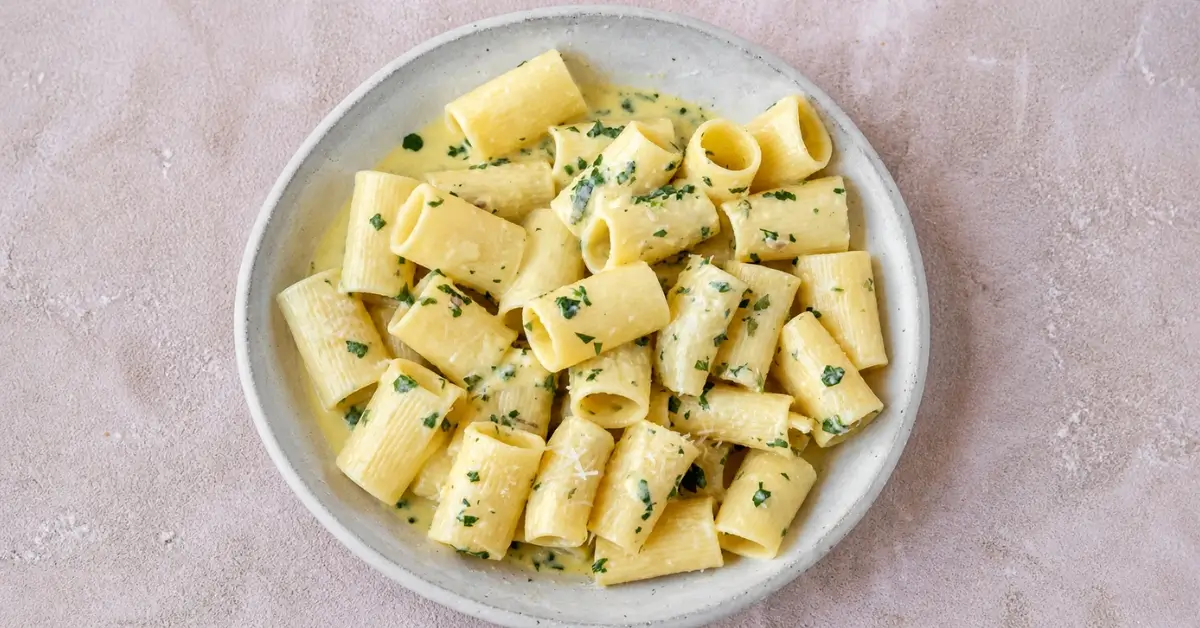
2. Creamy Garlic Pasta
Ingredients
Main Ingredients
- 12 ounces fettuccine or linguine – Spaghetti, penne, or another pasta shape can also be used.
- 1 tablespoon salt – For seasoning the pasta water. Adjust as needed.
- 3 tablespoons unsalted butter – Salted butter works too, but reduce added salt later.
- 6 medium garlic cloves, finely minced – Fresh garlic gives the best flavor. In a pinch, use about 1 1/2 teaspoons garlic powder, though the flavor will be different.
- 1 tablespoon all-purpose flour – Helps lightly thicken the creamy garlic sauce. For a gluten-free option, use a 1-to-1 gluten-free flour blend.
- 1 1/2 cups heavy cream – Half-and-half can be substituted for a lighter sauce, but the finished texture will be thinner.
- 1 cup freshly grated Parmesan cheese – Freshly grated cheese melts more smoothly than shelf-stable pre-shredded Parmesan.
- 1/2 teaspoon freshly ground black pepper – Add more to taste.
- 1/4 teaspoon salt – Adjust after adding the Parmesan because the cheese already contains sodium.
- 1/2 cup reserved pasta water – Use only as much as needed to loosen and emulsify the sauce.
- 2 tablespoons chopped fresh parsley – Adds freshness and color.
Optional Ingredients
- 1/4 teaspoon crushed red pepper flakes – For gentle heat.
- 1 teaspoon fresh lemon juice – Helps balance the richness of the cream sauce.
- 1/2 teaspoon Italian seasoning – For extra herb flavor.
- 1/2 cup cooked chicken, shrimp, or sliced mushrooms – For a heartier meal.
- Extra grated Parmesan cheese – For serving.
- 1 teaspoon lemon zest – For a brighter finish.
Equipment Needed
- Large pot, preferably 5 to 6 quarts.
- Large skillet or sauté pan, about 10 to 12 inches.
- Colander.
- Measuring cups.
- Measuring spoons.
- Liquid measuring cup.
- Chef’s knife.
- Cutting board.
- Fine cheese grater or Microplane.
- Wooden spoon or heat-safe silicone spatula.
- Pasta tongs.
- Small bowl for holding grated Parmesan.
- Ladle or heat-safe measuring cup for reserving pasta water.
- Serving bowls or plates.
Step-by-Step Instructions
1. Prepare the Ingredients
Bring the butter, cream, Parmesan, garlic, and seasonings close to the stove before you begin cooking. Finely mince the garlic and grate the Parmesan cheese.
Freshly grated Parmesan is important because it melts more evenly into the sauce. Pre-shredded cheese often contains anti-caking ingredients that can make a creamy pasta sauce grainy.
Let the heavy cream sit at room temperature for about 5 to 10 minutes while you prepare the other ingredients. Very cold cream can take longer to blend smoothly into the sauce.
2. Boil the Pasta Water
Fill a large pot with about 4 quarts of water and bring it to a rolling boil over high heat. Add 1 tablespoon salt.
Once the water is bubbling steadily, add the pasta. Stir immediately so the noodles do not stick together.
Cook according to the package directions until al dente, usually about 9 to 11 minutes depending on the pasta shape and brand.
The pasta should be tender but still have a slight firmness in the center when bitten.
Do not overcook the pasta. It will continue cooking slightly when tossed with the warm cream sauce.
3. Reserve the Pasta Water
Before draining the pasta, carefully scoop out at least 1/2 cup of the hot, starchy cooking water. Set it aside.
Drain the pasta in a colander. Do not rinse it.
The thin layer of starch left on the noodles helps the creamy garlic sauce cling to the pasta.
Keep the drained pasta nearby and work quickly so it does not sit long enough to become sticky.
4. Melt the Butter
While the pasta cooks, place a large skillet over medium-low heat. Add 3 tablespoons unsalted butter.
Allow the butter to melt completely, but do not let it brown.
The butter should look fully melted and lightly foamy without developing dark brown specks.
5. Gently Cook the Garlic
Add the minced garlic to the melted butter. Cook for about 45 to 60 seconds, stirring constantly.
The garlic should smell fragrant and soften slightly.
Look for pale, lightly softened garlic. It should not become dark brown.
Burned garlic tastes bitter and can ruin the entire sauce. If the garlic starts browning quickly, lower the heat immediately.
6. Add the Flour
Sprinkle 1 tablespoon all-purpose flour over the garlic butter. Stir continuously for about 30 to 45 seconds.
This brief cooking step removes the raw flour taste and creates a light base for the creamy sauce.
The mixture should look smooth and slightly bubbly, not dry or deeply browned.
7. Add the Heavy Cream
Slowly pour in 1 1/2 cups heavy cream while stirring continuously. Adding it gradually helps prevent lumps.
Increase the heat slightly to medium and cook for about 3 to 4 minutes, stirring often. Do not bring the cream to a hard boil.
The sauce is ready for the cheese when it lightly coats the back of a spoon but still pours easily.
Boiling the cream aggressively can make the sauce reduce too quickly or develop an uneven texture.
8. Melt in the Parmesan
Reduce the heat to low. Add the freshly grated Parmesan a small handful at a time, stirring after each addition.
Continue stirring until the cheese is completely melted and the sauce looks smooth. Add the black pepper and 1/4 teaspoon salt.
Taste before adding extra salt because Parmesan can be naturally salty.
If the sauce looks too thick, stir in reserved pasta water 1 tablespoon at a time.
Do not add all the cheese at once over high heat. Excessive heat can cause the cheese to clump or turn grainy.
9. Add the Cooked Pasta
Transfer the drained pasta directly into the skillet. Use tongs to toss the noodles with the sauce for about 1 to 2 minutes over low heat.
Add a splash of reserved pasta water if needed.
The finished sauce should look glossy and creamy, with an even coating on every noodle. It should cling to the pasta rather than collect as a watery puddle at the bottom of the skillet.
10. Finish and Serve
Turn off the heat. Stir in the chopped fresh parsley and any optional lemon juice or crushed red pepper flakes.
Taste and adjust the seasoning if needed. Serve immediately with extra Parmesan and freshly ground black pepper.
Creamy pasta sauce naturally thickens as it cools. If it becomes too thick before serving, stir in 1 to 2 tablespoons of warm pasta water.
Nutrition Facts
Cost To Make This Recipe
Item – Estimated Cost (USD).
12 oz pasta – $1.50.
3 tbsp unsalted butter – $0.55.
6 garlic cloves – $0.50.
1 tbsp all-purpose flour – $0.05.
1 1/2 cups heavy cream – $3.25.
1 cup Parmesan cheese – $3.25.
Fresh parsley – $0.60.
Salt and black pepper – $0.15.
Estimated Total Recipe Cost
Approximately $9.85 USD.
Estimated Cost Per Serving
Approximately $2.46 USD per serving.
3. Chicken Taco Bowl

Ingredients
For the Seasoned Chicken
- 1 1/2 pounds boneless, skinless chicken breasts.
- 1 tablespoon olive oil.
- 2 teaspoons chili powder.
- 1 teaspoon ground cumin.
- 1 teaspoon smoked paprika.
- 1/2 teaspoon garlic powder.
- 1/2 teaspoon onion powder.
- 1/2 teaspoon dried oregano.
- 3/4 teaspoon kosher salt.
- 1/4 teaspoon ground black pepper.
- 1 tablespoon fresh lime juice.
Substitutions
- Use boneless, skinless chicken thighs instead of chicken breasts for a richer, juicier result.
- Replace the individual spices with about 2 tablespoons taco seasoning. Reduce added salt if the seasoning blend already contains plenty of sodium.
- Avocado oil can replace olive oil.
For the Taco Bowls
- 2 cups cooked long-grain white rice.
- 1 cup canned black beans, drained and rinsed.
- 1 cup corn kernels, canned and drained, frozen and thawed, or freshly cooked.
- 1 cup cherry tomatoes, halved.
- 2 cups shredded romaine lettuce.
- 1 cup shredded cheddar cheese or Mexican-style cheese blend.
- 1/2 cup salsa.
- 1/2 cup sour cream.
- 1 medium lime, cut into wedges.
- 2 tablespoons chopped fresh cilantro.
Substitutions
- Use cooked brown rice instead of white rice for a heartier texture.
- Substitute cauliflower rice for regular rice if preferred.
- Pinto beans can replace black beans.
- Use plain Greek yogurt instead of sour cream.
- Monterey Jack, pepper Jack, or queso fresco can replace cheddar cheese.
- Shredded iceberg lettuce can replace romaine.
Optional Ingredients
- 1 avocado, sliced or diced.
- 1/4 cup pickled jalapeno slices.
- 1/4 cup diced red onion.
- 1/4 cup sliced green onions.
- 1/2 cup guacamole.
- 1/2 cup pico de gallo.
- 1/4 cup crushed tortilla chips.
- Hot sauce, to taste.
- Extra lime wedges for serving.
Equipment Needed
- Large skillet, preferably 10 to 12 inches.
- Cutting board.
- Sharp chef’s knife.
- Measuring cups.
- Measuring spoons.
- Small mixing bowl.
- Medium mixing bowl.
- Wooden spoon or silicone spatula.
- Tongs.
- Can opener.
- Colander or fine-mesh strainer.
- Citrus juicer, optional.
- Instant-read meat thermometer.
- 4 serving bowls.
- Rice cooker or medium saucepan, if cooking rice from scratch.
Step-by-Step Instructions
1. Prepare the Rice
If you do not already have cooked rice, prepare it according to the package directions. You will need about 2 cups of cooked rice for this recipe.
Once cooked, fluff the rice gently with a fork. It should look tender and separate rather than wet or gummy.
Keep the rice covered and warm while you prepare the chicken.
Do not stir rice constantly while it cooks. Excess stirring can release too much starch and create a sticky texture.
2. Prepare the Chicken
Pat the chicken breasts dry with paper towels. Cut them into approximately 1-inch bite-size pieces.
Try to keep the pieces similar in size so they cook at roughly the same rate. If some pieces are much larger than others, the smaller pieces may dry out before the larger ones are fully cooked.
The raw chicken pieces should be evenly sized with no unusually thick chunks.
Patting the chicken dry helps it brown instead of steaming in the skillet.
3. Mix the Seasoning
In a small bowl, combine.
Chili powder.
Ground cumin.
Smoked paprika.
Garlic powder.
Onion powder.
Dried oregano.
Kosher salt.
Black pepper.
Sprinkle the seasoning mixture evenly over the chicken. Toss until every piece has a light, even coating.
Do not leave large clumps of seasoning on only a few pieces. Uneven seasoning creates inconsistent flavor.
4. Preheat the Skillet
Place a large skillet over medium-high heat and let it preheat for about 1 to 2 minutes. Add the olive oil and swirl it around the pan.
The oil should look shiny and move easily across the skillet, but it should not smoke heavily.
A properly preheated skillet gives the chicken better browning and deeper flavor.
5. Cook the Chicken
Add the seasoned chicken in a single layer. Let it cook undisturbed for about 3 minutes so the first side can develop some color.
Stir or flip the pieces, then continue cooking for another 5 to 7 minutes, stirring occasionally.
The exact cooking time depends on the size of the chicken pieces and the heat of your stove.
Visual cues when done.
The outside should look lightly browned.
The center should no longer appear pink.
The juices should run clear.
The thickest pieces should reach 165°F on an instant-read thermometer.
Do not overcrowd a small skillet. Crowded chicken releases moisture and steams instead of browning. If necessary, cook it in two batches.
6. Add Fresh Lime Juice
Reduce the heat to low. Drizzle 1 tablespoon fresh lime juice over the cooked chicken and toss gently for about 20 to 30 seconds.
Remove the skillet from the heat.
The lime juice adds brightness and balances the smoky spices.
Do not pour in a large amount of lime juice while the skillet is extremely hot. Too much liquid can make the chicken watery and reduce the browned texture.
7. Warm the Beans and Corn
Warm the drained black beans and corn in a small saucepan over medium-low heat for 3 to 5 minutes, or microwave them in a microwave-safe bowl until heated through.
The beans should be warm but still hold their shape. The corn should be hot and slightly tender.
Rinse canned black beans before using them. This removes excess canning liquid and can reduce some of the surface sodium.
8. Prepare the Fresh Toppings
While the chicken finishes cooking, prepare the remaining ingredients.
Halve the cherry tomatoes.
Shred the romaine lettuce.
Chop the cilantro.
Cut the lime into wedges.
Prepare avocado, onion, or jalapenos if using.
Keep cold ingredients separate until assembly so the lettuce stays crisp.
9. Assemble the Chicken Taco Bowl
Divide the ingredients evenly among 4 serving bowls.
For each bowl, start with approximately.
1/2 cup cooked rice.
1/4 cup black beans.
1/4 cup corn.
1/2 cup shredded romaine.
1/4 cup cherry tomatoes.
One-fourth of the cooked chicken.
1/4 cup shredded cheese.
2 tablespoons salsa.
2 tablespoons sour cream.
Finish each bowl with chopped cilantro and a fresh lime wedge.
Add avocado, jalapeños, guacamole, pico de gallo, crushed tortilla chips, or hot sauce if desired.
For the best texture, place hot ingredients such as rice, chicken, beans, and corn together, then add crisp lettuce and fresh toppings just before serving.
Nutrition Facts
Cost To Make This Recipe
Item – Estimated Cost (USD).
Chicken breasts – $6.00.
Rice – $0.60.
Black beans – $0.90.
Corn – $0.90.
Romaine lettuce – $1.50.
Cherry tomatoes – $1.75.
Shredded cheese – $2.25.
Salsa – $1.00.
Sour cream – $0.90.
Lime and cilantro – $1.10.
Olive oil and seasonings – $0.85.
Estimated Total Recipe Cost
Approximately $17.75 USD.
Estimated Cost Per Serving
Approximately $4.44 USD per serving.
4. Air Fryer Chicken Bites

Ingredients
Main Ingredients
- 1 1/2 pounds boneless, skinless chicken breasts – cut into roughly 1-inch bite-size pieces.
- 1 tablespoon olive oil – helps the seasoning stick and encourages browning.
- 1 teaspoon garlic powder.
- 1 teaspoon smoked paprika.
- 3/4 teaspoon kosher salt.
- 1/2 teaspoon onion powder.
- 1/2 teaspoon Italian seasoning.
- 1/4 teaspoon ground black pepper.
Optional Ingredients
- 1/4 teaspoon cayenne pepper – for extra heat.
- 1/2 teaspoon red pepper flakes – for a spicy finish.
- 1 tablespoon fresh chopped parsley – for garnish.
- 1 tablespoon fresh lemon juice – for brightness after cooking.
- 2 tablespoons grated Parmesan cheese – for a savory, cheesy finish.
- Cooking spray – useful if your air fryer basket tends to stick.
Ingredient Substitutions
- Chicken thighs: Replace chicken breasts with 1 1/2 pounds boneless, skinless chicken thighs. They usually stay extra juicy and may need an additional 1–3 minutes of cooking.
- Olive oil: Avocado oil or another neutral high-heat cooking oil works well.
- Smoked paprika: Regular paprika can be used for a milder flavor.
- Italian seasoning: Substitute 1/4 teaspoon dried oregano plus 1/4 teaspoon dried basil.
- Kosher salt: Table salt works, but use slightly less because it is finer and can taste saltier by volume.
Equipment Needed
- Air fryer.
- Large mixing bowl.
- Cutting board.
- Sharp chef’s knife.
- Measuring spoons.
- Measuring tablespoon.
- Kitchen tongs or silicone spatula.
- Instant-read meat thermometer.
- Serving plate or shallow bowl.
- Paper towels.
Step-by-Step Instructions
1. Preheat the Air Fryer
Preheat your air fryer to 400°F for 3–5 minutes, if your model recommends preheating.
Preheating gives the chicken immediate exposure to high heat, which helps create better browning around the edges. Some air fryers do not require this step, so check your manufacturer’s instructions.
The basket should feel fully hot when the chicken goes in.
Do not assume every air fryer heats at the same speed. Basket size, wattage, and model can affect cooking time.
2. Cut the Chicken Into Even Pieces
Place the chicken breasts on a clean cutting board. Pat them dry with paper towels, then cut the chicken into approximately 1-inch pieces.
Drying the surface matters because excess moisture can create steam. Too much steam makes it harder for the chicken bites to develop golden edges.
Try to keep the pieces similar in size. Perfect cubes are unnecessary, but large differences in thickness can lead to uneven cooking.
The chicken pieces should look evenly sized and have minimal surface moisture.
3. Season the Chicken
Place the chicken pieces in a large mixing bowl. Add the olive oil, garlic powder, smoked paprika, kosher salt, onion powder, Italian seasoning, and black pepper.
Toss thoroughly until every piece is lightly coated with oil and seasoning. Use clean tongs, a silicone spatula, or clean hands.
The chicken should have an even reddish-golden coating from the paprika and spices. You should not see large clumps of dry seasoning at the bottom of the bowl.
Do not pour excessive oil into the bowl. Too much oil can make the chicken greasy rather than nicely browned.
4. Arrange the Chicken in the Air Fryer Basket
Lightly coat the basket with cooking spray if your air fryer tends to stick. Arrange the seasoned chicken pieces in a single layer.
Leave a little space between pieces whenever possible. Depending on the size of your air fryer, you may need to cook in two batches.
A small amount of contact between pieces is usually fine, but the basket should not be tightly packed.
Overcrowding is one of the biggest reasons air fryer chicken bites turn out pale and watery. Crowded chicken releases moisture and steams instead of browning properly.
5. Air Fry the Chicken Bites
Cook at 400°F for 5 minutes.
Open the basket and shake it firmly, or turn the chicken pieces with tongs. Continue cooking for another 4–6 minutes.
The estimated total cooking time is 9–11 minutes, but thicker pieces may need slightly longer.
The outside should look lightly golden with darker seasoning around some edges. The chicken should appear opaque throughout rather than glossy or translucent.
Start checking early if you cut the chicken smaller than 1 inch. Small pieces can overcook quickly.
6. Check the Internal Temperature
Insert an instant-read thermometer into one of the largest pieces without touching the basket.
The chicken is ready when the thickest pieces reach 165°F.
If the temperature is below 165°F, return the basket to the air fryer and cook for 1–2 additional minutes, then check again.
Do not rely only on exterior color. Paprika can make chicken look deeply browned before the center is fully cooked.
Also avoid cooking far beyond 165°F unless necessary. Chicken breast is lean and can become dry when overcooked.
7. Rest and Serve
Transfer the cooked chicken bites to a serving plate and let them rest for 2–3 minutes.
For extra flavor, finish with chopped parsley, fresh lemon juice, red pepper flakes, or grated Parmesan cheese.
Serve immediately while the edges are warm and lightly crisp.
These Air Fryer Chicken Bites pair well with white rice, brown rice, mashed potatoes, roasted vegetables, macaroni and cheese, salad, tortillas, or dipping sauces such as ranch, honey mustard, barbecue sauce, or buffalo sauce.
Nutrition Facts
Cost To Make This Recipe
Item – Estimated Cost (USD).
1 1/2 lb boneless, skinless chicken breasts – $6.50.
1 tbsp olive oil – $0.20.
Garlic powder – $0.10.
Smoked paprika – $0.15.
Kosher salt – $0.03.
Onion powder – $0.08.
Italian seasoning – $0.10.
Black pepper – $0.05.
Estimated Total Recipe Cost
Approximately $7.21 USD.
Estimated Cost Per Serving
Approximately $1.80 USD per serving.
5. Cottage Cheese Flatbread

Ingredients
Main Ingredients
- 1 cup cottage cheese – Use 2% or 4% milkfat cottage cheese for the best flavor and texture. Small-curd or large-curd both work because the mixture will be blended.
- 2 large eggs – Help bind the flatbread and give it structure.
- 2 tablespoons all-purpose flour – Helps reduce excess moisture and makes the flatbread easier to handle.
- 1/2 teaspoon garlic powder – Adds mild savory flavor.
- 1/2 teaspoon Italian seasoning – Adds an herby flavor that works well for wraps and sandwiches.
- 1/4 teaspoon fine salt – Adjust depending on how salty your cottage cheese is.
- 1/8 teaspoon ground black pepper – Adds a light peppery finish.
- Nonstick cooking spray – For lightly coating the parchment paper.
Optional Ingredients
- 1 tablespoon grated Parmesan cheese – For a richer, more savory flavor.
- 1/4 teaspoon onion powder – Adds extra depth.
- 1/4 teaspoon crushed red pepper flakes – For mild heat.
- 1 tablespoon chopped fresh herbs – Parsley, chives, or basil all work well.
- 1 teaspoon everything bagel seasoning – Sprinkle on top before baking.
Ingredient Substitutions
- Cottage cheese: Full-fat cottage cheese gives the richest result, but 2% cottage cheese works well. Fat-free cottage cheese can be used, though the flatbread may be slightly drier.
- All-purpose flour: Substitute oat flour in an equal amount for a slightly softer texture.
- Italian seasoning: Use dried oregano, dried basil, or a combination of both.
- Parmesan cheese: Pecorino Romano can be used for a sharper, saltier flavor.
Equipment Needed
- High-speed blender or food processor.
- Measuring cups.
- Measuring spoons.
- Rubber spatula.
- Large rimmed baking sheet.
- Parchment paper.
- Nonstick cooking spray.
- Oven mitts.
- Wire cooling rack, optional.
- Pizza cutter or sharp knife, for slicing.
Step-by-Step Instructions
1. Preheat the Oven
Preheat your oven to 350°F.
Line a large rimmed baking sheet with parchment paper. Lightly coat the parchment with nonstick cooking spray.
Do not pour the batter directly onto an unlined baking sheet. The egg and cheese mixture can stick firmly to the metal.
2. Blend the Batter
Add the cottage cheese, eggs, all-purpose flour, garlic powder, Italian seasoning, salt, and black pepper to a blender or food processor.
Blend for 30–60 seconds, stopping once if needed to scrape down the sides.
The mixture is ready when it looks smooth, creamy, and mostly free of visible cottage cheese curds. It should be pourable but not watery.
Do not skip blending. Unblended cottage cheese can create uneven wet spots and a lumpy texture.
3. Pour and Shape the Flatbread
Pour the blended mixture onto the prepared baking sheet.
Use a rubber spatula to spread it into an even rectangle approximately 9 x 12 inches. Aim for roughly 1/4 inch thick across the surface.
Keep the center and edges as even as possible.
The batter should form a smooth, level layer without very thin transparent areas.
Spreading the batter too thin can make the edges dry and brittle before the center is fully cooked.
4. Add Optional Toppings
If using Parmesan cheese, everything bagel seasoning, fresh herbs, or crushed red pepper flakes, sprinkle them evenly over the top.
Use a light hand with salty toppings because cottage cheese already contains a noticeable amount of sodium.
5. Bake the Cottage Cheese Flatbread
Place the baking sheet on the center oven rack.
Bake at 350°F for 25–30 minutes.
Start checking around the 25-minute mark. The exact cooking time can vary depending on your oven, cottage cheese brand, moisture level, and how thickly the batter was spread.
The Cottage Cheese Flatbread is done when.
The top looks set rather than wet.
The edges are lightly golden brown.
The center feels firm when gently touched.
No liquid egg mixture is visible.
The flatbread begins to release slightly around the edges.
If the center still looks glossy or jiggles noticeably, bake for another 3–5 minutes.
Do not remove the flatbread while the middle is still wet. An underbaked center can tear when you try to lift or roll it.
6. Cool Before Removing
Remove the baking sheet from the oven and let the flatbread cool for 5–10 minutes.
Cooling is important because the proteins continue to set as the flatbread rests.
Carefully loosen the edges with a thin spatula. Slowly peel the parchment paper away rather than pulling the flatbread upward.
A properly baked flatbread should hold together when lifted and feel soft but set.
7. Slice and Serve
Cut the flatbread into 2 large servings, or slice it into smaller pieces for snacks and mini sandwiches.
Serve it warm or at room temperature. This high-protein flatbread works well with.
Sliced turkey and cheese.
Grilled chicken.
Scrambled eggs.
Avocado and tomato.
Hummus and vegetables.
Pizza sauce and mozzarella.
Cream cheese and smoked salmon.
For a wrap, avoid overfilling it. A moderate amount of filling makes the flatbread easier to fold without tearing.
Nutrition Facts
Cost To Make This Recipe
Item – Estimated Cost (USD).
1 cup cottage cheese – $1.35.
2 large eggs – $0.70.
2 tablespoons all-purpose flour – $0.05.
Garlic powder – $0.04.
Italian seasoning – $0.06.
Salt and black pepper – $0.03.
Nonstick cooking spray – $0.07.
Estimated Total Recipe Cost
Approximately $2.30 USD.
Estimated Cost Per Serving
Approximately $1.15 USD per serving.
6. Loaded Baked Potato Bowl

Ingredients
Main Ingredients
- 4 large russet potatoes, about 10 to 12 ounces each.
- 1 tablespoon olive oil.
- 1 teaspoon kosher salt, divided.
- 1/2 teaspoon ground black pepper.
- 1 cup shredded sharp cheddar cheese.
- 6 slices bacon, cooked until crisp and crumbled.
- 1/2 cup sour cream.
- 1/4 cup whole milk.
- 2 tablespoons unsalted butter.
- 1/4 cup sliced green onions.
- 1/2 teaspoon garlic powder.
Optional Ingredients
- 1 cup cooked shredded chicken.
- 1/2 cup steamed broccoli florets.
- 1/4 cup pickled jalapeno slices.
- 1/2 cup canned black beans, drained and rinsed.
- 1/4 cup diced tomatoes.
- 2 tablespoons chopped fresh chives.
- Hot sauce, to taste.
- Ranch dressing, for drizzling.
- Extra shredded cheddar cheese, for topping.
Ingredient Substitutions
- Russet potatoes: Yukon Gold potatoes can work, but the texture will be creamier and less fluffy.
- Sharp cheddar cheese: Substitute Monterey Jack, Colby Jack, pepper Jack, or a Mexican-style cheese blend.
- Sour cream: Plain full-fat Greek yogurt is a good substitute with extra protein and a slightly tangy flavor.
- Whole milk: Use 2% milk, half-and-half, or an unsweetened plain dairy-free milk.
- Bacon: Turkey bacon can be used for a lighter option.
- Butter: Use olive oil or a plant-based butter alternative if preferred.
Equipment Needed
- Large baking sheet.
- Parchment paper or aluminum foil.
- Fork.
- Sharp chef’s knife.
- Cutting board.
- Measuring cups.
- Measuring spoons.
- Large mixing bowl.
- Potato masher or sturdy fork.
- Silicone spatula or large spoon.
- Cheese grater, if using block cheese.
- Small skillet, for cooking bacon.
- Tongs.
- Oven mitts.
- 4 serving bowls.
Optional Equipment
- Air fryer, for cooking potatoes faster.
- Microwave, for partially cooking potatoes before baking.
- Instant-read thermometer, for checking potato doneness.
Step-by-Step Instructions
Step 1: Preheat the Oven
Preheat your oven to 425°F. Line a large baking sheet with parchment paper or aluminum foil for easier cleanup.
Allow the oven to fully preheat before adding the potatoes. Starting in a cooler oven can increase cooking time and may lead to unevenly baked potatoes.
Step 2: Wash and Dry the Potatoes
Scrub the russet potatoes thoroughly under cool running water to remove any dirt. Dry them completely with a clean kitchen towel or paper towels.
Pierce each potato 5 to 6 times with a fork. These small holes allow steam to escape while the potatoes bake.
Do not skip piercing the potatoes. Steam can build up inside during baking.
Step 3: Season the Potato Skins
Rub the potatoes evenly with 1 tablespoon olive oil. Sprinkle them with about 1/2 teaspoon kosher salt.
Place the potatoes on the prepared baking sheet, leaving a little space between each one.
The olive oil helps the skins become lightly crisp, while the salt adds flavor.
Step 4: Bake Until Completely Tender
Bake the potatoes at 425°F for 50 to 60 minutes.
The exact cooking time depends on potato size. Larger russet potatoes may need an extra 5 to 10 minutes.
The potatoes are done when.
A fork or thin knife slides easily into the center.
The skins look dry and lightly crisp.
The potatoes feel soft when gently pressed with an oven mitt.
If using an instant-read thermometer, the center should generally be around 205°F to 210°F for a fluffy texture.
If the center still feels firm, continue baking in 5-minute intervals.
Step 5: Cook the Bacon
While the potatoes bake, place the bacon in a skillet over medium heat.
Cook for about 8 to 12 minutes, turning as needed, until browned and crisp. Transfer the bacon to a paper towel-lined plate and let it cool slightly.
Crumble or chop it into small pieces.
Do not use very soft bacon unless that is your preference. Crisp bacon gives the Loaded Baked Potato Bowl better texture and keeps the toppings from feeling too heavy.
Step 6: Open the Baked Potatoes
Remove the baked potatoes from the oven and let them rest for about 5 minutes. They will be extremely hot, so handle them carefully.
Slice each potato lengthwise. Scoop the fluffy potato flesh into a large mixing bowl.
You can include some chopped potato skin if you enjoy extra texture. The seasoned skins add a nice roasted flavor.
Step 7: Make the Creamy Potato Base
Add the following to the warm potato flesh.
2 tablespoons unsalted butter.
1/4 cup whole milk.
1/2 teaspoon garlic powder.
Remaining 1/2 teaspoon kosher salt.
1/2 teaspoon ground black pepper.
Mash gently until creamy but still slightly chunky.
The mixture should look soft and fluffy, not runny or gluey.
Do not aggressively overmix the potatoes. Too much mixing can release excess starch and create a gummy texture.
If the mixture seems too thick, add milk 1 tablespoon at a time until it reaches your preferred consistency.
Step 8: Assemble the Bowls
Divide the warm potato mixture evenly among 4 serving bowls.
Top each bowl with.
Shredded sharp cheddar cheese.
Crumbled crispy bacon.
Sour cream.
Sliced green onions.
Add any optional toppings you like, such as cooked chicken, broccoli, jalapenos, black beans, diced tomatoes, or hot sauce.
Step 9: Melt the Cheese
For the best texture, add the cheddar while the potatoes are still very hot. The heat should soften and melt the cheese.
If you want extra-melty cheese, place oven-safe bowls on a baking sheet and heat them at 375°F for 3 to 5 minutes, just until the cheese melts.
Do not broil unattended. Cheese can go from melted to burned very quickly.
Step 10: Serve Immediately
Finish each Loaded Baked Potato Bowl with extra green onions, black pepper, bacon, or a small spoonful of sour cream.
Serve immediately while the potatoes are hot and the cheese is melted.
For a complete meal, pair the bowl with a simple green salad, roasted vegetables, grilled chicken, or steamed broccoli.
Nutrition Facts
Cost To Make This Recipe
Item – Estimated Cost (USD).
4 large russet potatoes – $3.00.
Olive oil – $0.15.
Kosher salt and black pepper – $0.10.
Sharp cheddar cheese – $2.25.
6 slices bacon – $2.75.
Sour cream – $0.90.
Whole milk – $0.15.
Unsalted butter – $0.35.
Green onions – $0.60.
Garlic powder – $0.05.
Estimated Total Recipe Cost
Approximately $10.30 USD.
Estimated Cost Per Serving
Approximately $2.58 USD per serving.
7. 15 Minute Ramen Upgrade

Ingredients
Main Ingredients
- 1 package instant ramen noodles, about 3 ounces.
- 2 cups low-sodium chicken broth.
- 1 large egg.
- 1 teaspoon sesame oil.
- 1 clove garlic, finely minced.
- 1 teaspoon fresh ginger, finely grated.
- 1 tablespoon low-sodium soy sauce.
- 1 teaspoon sriracha, or less to taste.
- 1/2 cup sliced mushrooms.
- 1/2 cup packed baby spinach.
- 1/4 cup shredded carrots.
- 2 tablespoons sliced green onions.
- 1 teaspoon toasted sesame seeds.
Optional Ingredients
- 1/2 cup cooked shredded chicken.
- 1/2 cup cooked shrimp.
- 1/2 cup cubed firm tofu.
- 1 teaspoon chili crisp.
- 1 sheet roasted nori, cut into strips.
- 1/4 cup corn kernels.
- 1/4 cup bean sprouts.
- 1 teaspoon lime juice.
- 1/2 teaspoon red pepper flakes.
- 1 tablespoon chopped fresh cilantro.
Ingredient Substitutions
- Chicken broth: Use vegetable broth for a meat-free version or beef broth for a deeper flavor.
- Soy sauce: Substitute tamari for a gluten-free option, but also choose certified gluten-free noodles if needed.
- Sesame oil: Use a neutral oil such as avocado oil, though the ramen will have less toasted flavor.
- Baby spinach: Substitute chopped kale or bok choy. Kale may need an extra minute of cooking.
- Mushrooms: White button, cremini, or sliced shiitake mushrooms all work well.
- Fresh ginger: Use about 1/4 teaspoon ground ginger in a pinch.
- Sriracha: Substitute another favorite hot sauce or simply leave it out.
- Instant ramen: Use any standard 3-ounce ramen noodle package. You can discard the seasoning packet or use only a small portion of it.
Equipment Needed
- Medium saucepan or small pot.
- Measuring cups.
- Measuring spoons.
- Cutting board.
- Sharp kitchen knife.
- Small grater or microplane for fresh ginger.
- Wooden spoon or heat-safe cooking spoon.
- Fork or chopsticks.
- Small bowl.
- Ladle.
- Serving bowl.
- Kitchen timer.
Optional equipment
- Garlic press.
- Fine-mesh strainer.
- Tongs.
- Slotted spoon for lifting the egg.
Step-by-Step Instructions
1. Prepare All the Ingredients
Before turning on the stove, mince the garlic, grate the ginger, slice the mushrooms and green onions, and shred the carrots if they are not already prepared.
Keep the spinach and toppings nearby because this recipe cooks quickly.
Finish all chopping before you start cooking. Once the broth begins simmering, the remaining steps move fast.
Do not wait until the noodles are cooking to start slicing vegetables. The noodles may become too soft while you are still preparing ingredients.
2. Build the Flavor Base
Place a medium saucepan over medium heat. Add 1 teaspoon sesame oil and let it warm for about 20 to 30 seconds.
Add the minced garlic and grated ginger. Stir constantly for about 30 seconds.
The mixture is ready when it smells fragrant and the garlic looks slightly softened but not dark brown.
Look for tiny bubbles around the garlic and ginger.
Garlic burns quickly. If it becomes dark brown, it can make the entire bowl taste bitter.
3. Add the Broth and Seasonings
Carefully pour in 2 cups low-sodium chicken broth. Add the soy sauce and sriracha, then stir well.
Increase the heat to medium-high and bring the broth to a gentle simmer. This usually takes about 2 to 3 minutes.
A gentle simmer has small, steady bubbles around the edges and across parts of the surface. You do not need a violent rolling boil.
Taste the broth carefully. If it needs more salt, add a tiny splash of soy sauce. Remember that additional toppings can also increase the sodium.
4. Cook the Vegetables
Add the sliced mushrooms and shredded carrots to the simmering broth.
Cook for about 2 minutes, stirring once or twice.
The mushrooms should begin to soften, while the carrots should remain slightly crisp.
Thinly sliced vegetables are important in a 15-minute recipe. Thick pieces may still be raw when the noodles are finished.
5. Add the Ramen Noodles
Place the ramen noodle block into the simmering broth. Let it soften for about 30 seconds, then gently separate the strands with a fork or chopsticks.
Cook according to the package directions, usually 2 to 3 minutes.
The noodles should bend easily and separate into tender strands, but they should not look swollen or mushy.
Do not aggressively stir the noodles from the moment they enter the pot. Let the block soften first so the noodles separate without breaking into tiny pieces.
6. Cook the Egg
When the noodles have about 2 minutes of cooking time remaining, gently crack the egg directly into the simmering broth.
Reduce the heat to medium-low, cover the saucepan, and cook for about 2 minutes for a soft yolk or 3 to 4 minutes for a firmer yolk.
For food safety, cook eggs to your preferred doneness while considering current guidance for higher-risk individuals.
The egg white should look opaque and set rather than clear. The yolk can remain soft if that is your preference.
Avoid a hard rolling boil after adding the egg. Strong bubbling can break the egg apart and make the broth cloudy.
7. Wilt the Spinach
Add the baby spinach during the final 30 to 60 seconds of cooking.
Gently press it into the hot broth until wilted.
The spinach should turn bright green and shrink noticeably. It does not need several minutes of cooking.
If using fully cooked shredded chicken, add it now and heat until steaming hot throughout. If using shrimp, make sure it is already cooked unless you separately allow enough time to cook raw shrimp safely to 145°F.
8. Taste and Adjust
Turn off the heat and carefully taste a small spoonful of broth.
Add more sriracha for heat, a small splash of soy sauce for extra savory flavor, or lime juice for brightness.
Make small adjustments. It is easy to add more seasoning, but difficult to fix an overly salty broth.
9. Finish and Serve
Transfer the noodles and broth to a large serving bowl. Arrange the egg on top, then finish with sliced green onions and toasted sesame seeds.
Add any optional toppings such as chili crisp, nori, corn, cilantro, or bean sprouts.
Serve immediately while the broth is hot and the noodles still have a pleasant texture.
Do not leave finished ramen sitting in the pot for several minutes. The noodles continue absorbing broth and can quickly become overly soft.
Nutrition Facts
Cost To Make This Recipe
Item – Estimated Cost (USD).
Instant ramen noodles – $0.60.
Low-sodium chicken broth – $0.80.
Large egg – $0.35.
Sesame oil – $0.10.
Garlic – $0.10.
Fresh ginger – $0.10.
Low-sodium soy sauce – $0.10.
Sriracha – $0.10.
Mushrooms – $0.75.
Baby spinach – $0.50.
Shredded carrots – $0.20.
Green onions – $0.20.
Sesame seeds – $0.10.
Estimated Total Recipe Cost
Approximately $4.00 USD.
Estimated Cost Per Serving
Approximately $4.00 USD per serving.
8. Grilled Cheese Upgrade

Ingredients
Main Ingredients
- 4 slices sturdy sandwich bread, sourdough, or country-style white bread.
- 2 tablespoons unsalted butter, softened.
- 1 teaspoon Dijon mustard.
- 4 ounces sharp cheddar cheese, freshly shredded.
- 2 ounces low-moisture mozzarella cheese, freshly shredded.
- 2 tablespoons finely grated Parmesan cheese.
- 1/4 teaspoon garlic powder.
- 1/8 teaspoon freshly ground black pepper.
Optional Ingredients
- 2 tablespoons finely chopped green onions.
- 2 slices cooked bacon, crumbled.
- 4 thin tomato slices, patted very dry.
- 1 tablespoon chopped pickled jalapenos.
- 1/2 teaspoon hot honey for a sweet-spicy finish.
- 1/4 teaspoon smoked paprika for extra depth.
- Tomato soup for serving.
Ingredient Substitutions
- Bread: Replace sourdough or white bread with whole wheat, brioche, Texas toast, or another sturdy sandwich bread.
- Sharp cheddar: Use medium cheddar, Monterey Jack, Colby Jack, Gruyere, or American cheese.
- Mozzarella: Substitute Monterey Jack or provolone for another mild, melty option.
- Butter: Use mayonnaise on the outside of the bread if preferred. It creates an evenly browned crust.
- Dijon mustard: Substitute yellow mustard or leave it out for a milder sandwich.
- Parmesan: Pecorino Romano can work, but it has a saltier, sharper flavor.
Equipment Needed
- Large nonstick skillet or well-seasoned cast-iron skillet.
- Cutting board.
- Bread knife or chef’s knife.
- Box grater.
- Measuring spoons.
- Small mixing bowl.
- Butter knife or small offset spatula.
- Wide spatula for flipping.
- Plate for serving.
- Instant-read thermometer, optional.
- Griddle, optional for cooking several sandwiches at once.
Step-by-Step Instructions
1. Prepare the Ingredients
Set the butter out until it becomes soft enough to spread without tearing the bread. Shred the cheddar and mozzarella if you are using cheese from a block.
In a small bowl, combine.
4 ounces shredded sharp cheddar.
2 ounces shredded mozzarella.
1/4 teaspoon garlic powder.
1/8 teaspoon black pepper.
Toss gently until evenly mixed.
The two cheeses should look evenly distributed, with no large clumps.
Do not use thick chunks of cold cheese. They can take too long to melt, causing the bread to burn first.
2. Prepare the Bread
Place all 4 bread slices on a cutting board.
Spread about 1/2 tablespoon softened butter over one side of each slice. Make sure the butter reaches close to the edges. This helps create consistent browning instead of pale corners.
Flip the bread so the buttered sides face down.
Spread a very thin layer of Dijon mustard over the inside of 2 slices. Sprinkle the Parmesan evenly over the buttered exterior sides, pressing it lightly into the butter so it sticks.
Keep the mustard layer thin. Too much can overpower the cheese and make the center slippery.
3. Build the Sandwiches
Divide the cheese mixture evenly between 2 bread slices. Spread it from edge to edge, but do not pack it down too tightly.
Add any optional fillings now. If using tomato, pat the slices thoroughly with paper towels first.
Place the remaining bread slices on top with the buttered sides facing outward.
Each sandwich should be evenly filled and about 3/4 to 1 inch thick in the center.
Overfilling the sandwich may sound tempting, but too much cheese can spill into the skillet before the center melts properly.
4. Preheat the Skillet
Place a large skillet over medium-low heat for about 2 minutes. If using a surface thermometer, aim for approximately 300–325°F.
This moderate temperature is important. High heat can produce dark bread with cold, barely melted cheese inside.
If butter immediately smokes when it touches the skillet, the pan is too hot.
5. Cook the First Side
Place both sandwiches in the skillet if they fit without touching. Otherwise, cook them one at a time.
Cook for 3–4 minutes on the first side.
Press very lightly with a spatula once or twice. Do not flatten the sandwich aggressively.
Visual cues that it is ready to flip.
The bottom is deep golden brown.
The Parmesan has formed a lightly crisp crust.
The cheese near the edges is beginning to soften.
The sandwich moves easily when nudged with a spatula.
Constantly lifting the bread to check it can interrupt even browning. Check after about 2 1/2 to 3 minutes.
6. Flip Carefully
Slide a wide spatula completely underneath the sandwich and flip it in one smooth motion.
Cook the second side for another 3–4 minutes over medium-low heat.
If the bread browns too quickly but the cheese is not fully melted, reduce the heat to low and loosely cover the skillet for 30–60 seconds.
Cover only briefly. Too much trapped steam can soften the crispy bread.
7. Check for Doneness
The Grilled Cheese Upgrade is ready when.
Both sides are evenly golden brown.
The exterior feels crisp.
The cheese is visibly melted at the edges.
The sandwich feels hot through the center.
For an optional temperature check, the center should be hot and fully melted, roughly 150–160°F.
If the outside looks done but the center still feels firm, lower the heat and cook for another 1–2 minutes.
8. Rest, Slice, and Serve
Transfer the sandwiches to a cutting board and let them rest for 1 minute before slicing.
This short rest allows the melted cheese to settle slightly, making the sandwich easier to cut without losing all the filling.
Slice diagonally and serve immediately.
For the best texture, enjoy this upgraded grilled cheese while the Parmesan crust is still crisp and the cheese center is warm and stretchy.
Nutrition Facts
Cost To Make This Recipe
Item – Estimated Cost (USD).
4 slices bread – $0.80.
2 tablespoons butter – $0.30.
4 ounces sharp cheddar – $1.60.
2 ounces mozzarella – $0.70.
2 tablespoons Parmesan – $0.40.
Dijon mustard – $0.10.
Garlic powder – $0.03.
Black pepper – $0.02.
Estimated Total Recipe Cost
Approximately $3.95 USD.
Estimated Cost Per Serving
Approximately $1.98 USD per serving.
9. Frozen Yogurt Protein Bark

Ingredients
Main Ingredients
- 2 cups plain Greek yogurt, preferably 2% or whole milk.
- 1/3 cup vanilla protein powder.
- 2 tablespoons creamy peanut butter.
- 1 tablespoon honey or pure maple syrup.
- 1 teaspoon pure vanilla extract.
- 1/2 cup fresh strawberries, thinly sliced.
- 1/3 cup fresh blueberries.
- 2 tablespoons mini chocolate chips.
- 2 tablespoons chopped almonds.
- 1 small pinch salt.
Optional Ingredients
- 1 tablespoon chia seeds for extra fiber.
- 2 tablespoons unsweetened shredded coconut.
- 1 tablespoon hemp hearts.
- 1/2 teaspoon ground cinnamon.
- 2 tablespoons granola for extra crunch.
- Extra peanut butter for drizzling over the top.
Ingredient Substitutions
- Greek yogurt: Use vanilla Greek yogurt for a sweeter bark. A thick dairy-free Greek-style yogurt can also work, although the texture may be softer.
- Vanilla protein powder: Substitute chocolate, strawberry, or unflavored protein powder. Different protein powders absorb moisture differently, so add a tablespoon or two of yogurt if the mixture becomes too thick.
- Peanut butter: Use almond butter, cashew butter, or sunflower seed butter.
- Honey: Replace with pure maple syrup or another preferred sweetener.
- Strawberries and blueberries: Use raspberries, blackberries, sliced banana, or another favorite fruit.
- Almonds: Substitute chopped pecans, walnuts, pistachios, or pumpkin seeds.
Equipment Needed
- Large mixing bowl.
- Measuring cups.
- Measuring spoons.
- Whisk or sturdy silicone spatula.
- Rubber spatula.
- Chef’s knife.
- Cutting board.
- Rimmed baking sheet or 9 x 13-inch freezer-safe pan.
- Parchment paper.
- Spoon for drizzling peanut butter.
- Freezer.
- Freezer-safe storage container or zip-top freezer bag.
Step-by-Step Instructions
1. Prepare the Pan
Line a rimmed baking sheet or a 9 x 13-inch freezer-safe pan with parchment paper.
Leave a little extra parchment hanging over the edges. This makes the frozen bark easier to lift from the pan later.
The parchment should lie mostly flat and cover the entire area where the yogurt mixture will spread.
Do not spread the yogurt directly onto an unlined metal pan. Frozen yogurt can stick firmly to the surface and become difficult to remove.
2. Make the Protein Yogurt Mixture
Add 2 cups Greek yogurt, 1/3 cup vanilla protein powder, 2 tablespoons peanut butter, 1 tablespoon honey, 1 teaspoon vanilla extract, and a small pinch of salt to a large mixing bowl.
Whisk or stir until completely combined.
Scrape the sides and bottom of the bowl with a spatula so no dry pockets of protein powder remain.
The mixture should look smooth, thick, and creamy with an even color.
If it seems unusually stiff or dry, stir in 1 to 2 tablespoons of additional Greek yogurt. Protein powder brands vary, and some absorb much more moisture than others.
Do not add a large amount of protein powder without adjusting the moisture. Too much powder can create a chalky, dry texture.
3. Taste and Adjust
Taste a small spoonful of the yogurt mixture before freezing.
If your protein powder is already sweet, the mixture may need no extra sweetener. If it tastes too tart, add another 1 to 2 teaspoons of honey or maple syrup.
Remember that frozen foods often taste slightly less sweet than they do at room temperature.
4. Spread the Mixture Evenly
Transfer the protein yogurt mixture to the prepared pan.
Use a rubber spatula or the back of a spoon to spread it into a rectangle about 1/4 to 1/3 inch thick.
The surface should be mostly level without very thick mounds or paper-thin edges.
An even layer freezes more consistently. Thick sections stay softer while very thin sections can become overly hard and icy.
5. Add the Toppings
Arrange the sliced strawberries and blueberries evenly over the yogurt layer.
Sprinkle with mini chocolate chips and chopped almonds. Add chia seeds, coconut, hemp hearts, or granola if using.
Press the toppings very gently into the yogurt with clean fingertips or the back of a spoon.
The toppings should sit partly inside the yogurt rather than resting loosely on top.
Do not overload the bark with wet fruit. Too much fruit adds extra water and can create icy patches.
6. Freeze Until Completely Firm
Place the pan on a flat freezer shelf.
Freeze for 3 to 4 hours, or until completely solid. A thicker layer may need up to 5 hours.
The center should feel hard when gently pressed. There should be no soft or creamy area in the middle.
Keep the pan level while freezing. If the pan tilts, the yogurt mixture can slide toward one side and freeze unevenly.
7. Break Into Pieces
Remove the frozen pan from the freezer.
Lift the bark out using the parchment paper. Place it on a cutting board and break it into approximately 8 pieces with clean hands.
For more uniform portions, use a sharp chef’s knife. If the bark is extremely hard, allow it to rest at room temperature for 2 to 3 minutes before cutting.
Do not leave the entire sheet at room temperature too long. Frozen yogurt softens quickly, especially in a warm kitchen.
8. Serve or Store
Enjoy the Frozen Yogurt Protein Bark immediately for a firm, cold texture.
For a slightly creamier bite, let one serving rest at room temperature for about 3 to 5 minutes before eating.
Store leftover pieces in a freezer-safe container. Place parchment paper between layers to prevent sticking. For the best texture and flavor, enjoy within 2 to 3 weeks.
Do not store this bark in the refrigerator for extended periods because it will soften back into a yogurt-like mixture.
Nutrition Facts
Cost To Make This Recipe
Item – Estimated Cost (USD).
Greek yogurt – $2.00.
Vanilla protein powder – $1.35.
Peanut butter – $0.25.
Honey – $0.20.
Vanilla extract – $0.15.
Fresh strawberries – $0.85.
Fresh blueberries – $0.75.
Mini chocolate chips – $0.30.
Chopped almonds – $0.40.
Salt – $0.01.
Estimated Total Recipe Cost
Approximately $6.26 USD.
Estimated Cost Per Serving
Approximately $0.78 USD per serving.
10. One Pot Tomato Pasta

Ingredients
Main Ingredients
- 12 ounces spaghetti or linguine – Regular dried pasta works best. Break long noodles in half if needed so they fit comfortably in the pot.
- 1 tablespoon olive oil – Helps soften the aromatics and adds richness.
- 1 small yellow onion, finely diced – About 1 cup. A white onion can be substituted.
- 4 garlic cloves, minced – Fresh garlic gives the best flavor. Substitute 1 teaspoon garlic powder if necessary.
- 1 can (28 ounces) crushed tomatoes – Creates the main tomato base. Tomato puree can be used for a smoother sauce.
- 3 cups low-sodium vegetable broth – Chicken broth also works if the dish does not need to be vegetarian.
- 1 teaspoon Italian seasoning – Substitute a mixture of dried oregano and dried basil.
- 1/2 teaspoon kosher salt – Add more after tasting if needed.
- 1/4 teaspoon ground black pepper.
- 1/4 teaspoon red pepper flakes – Reduce or omit for a milder pasta.
- 1/2 cup finely grated Parmesan cheese – Freshly grated Parmesan melts more smoothly than pre-shredded cheese.
- 1/4 cup chopped fresh basil – Adds fresh flavor at the end.
Optional Ingredients
- 1 tablespoon tomato paste – For a deeper, richer tomato flavor.
- 1 teaspoon granulated sugar – Useful only if the tomatoes taste noticeably acidic.
- 1/2 cup heavy cream – For a richer, creamy tomato pasta.
- 1 cup baby spinach – An easy way to add greens.
- 8 ounces sliced mushrooms – Adds a savory flavor and heartier texture.
- 1/2 pound cooked Italian sausage – For extra protein.
- 1 cup shredded mozzarella cheese – For a cheesier finish.
- Extra Parmesan and fresh basil – For serving.
Ingredient Substitutions
- Spaghetti: Use linguine, fettuccine, penne, or another dried pasta. Short pasta may require a small adjustment in cooking time and liquid.
- Vegetable broth: Substitute low-sodium chicken broth or water. Broth provides better flavor than plain water.
- Parmesan cheese: Use Pecorino Romano for a sharper, saltier finish.
- Fresh basil: Substitute 1 teaspoon dried basil, but add it with the other dried seasonings.
- Crushed tomatoes: Use tomato puree for a smoother sauce or whole peeled tomatoes crushed by hand.
Equipment Needed
- Large Dutch oven, deep skillet, or heavy-bottomed pot with a lid.
- Sharp chef’s knife.
- Cutting board.
- Measuring cups.
- Measuring spoons.
- 28-ounce liquid measuring cup, optional but helpful.
- Wooden spoon or heat-resistant silicone spatula.
- Garlic press, optional.
- Cheese grater.
- Can opener.
- Kitchen tongs.
- Ladle or large serving spoon.
- Timer.
Step-by-Step Instructions
Step 1: Prepare the Ingredients
Before turning on the stove, dice the onion, mince the garlic, chop the basil, and grate the Parmesan cheese.
If using spaghetti or linguine, break the noodles in half. This makes them easier to fit into the pot and helps them stay submerged in the cooking liquid.
Have every ingredient measured before cooking. Once the garlic goes into the pot, the recipe moves quickly.
Do not leave garlic unattended over heat. Burned garlic can make the entire tomato sauce taste bitter.
Step 2: Saute the Onion
Place a large Dutch oven or deep pot over medium heat. Add 1 tablespoon olive oil and let it warm for about 30 seconds.
Add the diced onion and cook for 4 to 5 minutes, stirring occasionally.
The onion is ready when it looks soft, glossy, and slightly translucent. It should not become dark brown.
If the onion starts browning too quickly, reduce the heat to medium-low.
Step 3: Add the Garlic and Seasonings
Add the minced garlic, Italian seasoning, black pepper, and red pepper flakes.
Cook for 30 to 45 seconds, stirring constantly.
You will know this step is done when the garlic smells fragrant. Do not wait for it to turn dark brown.
If using tomato paste, add it now and cook for about 1 minute. Stir continuously until the paste becomes slightly darker in color. This short cooking step helps develop a richer tomato flavor.
Step 4: Build the Tomato Sauce
Pour in the crushed tomatoes and vegetable broth. Add the kosher salt and stir thoroughly, scraping the bottom of the pot to loosen any flavorful bits.
Increase the heat to medium-high and bring the mixture to a gentle boil.
Small, steady bubbles should appear across the surface. Avoid an aggressive rolling boil because too much liquid may evaporate before the pasta finishes cooking.
Step 5: Add the Pasta
Add the dry pasta directly to the tomato mixture. Use kitchen tongs or a wooden spoon to press the noodles into the liquid.
Once the pasta begins to soften, stir and separate the noodles.
Reduce the heat to medium-low so the sauce maintains a steady simmer.
Do not add cooked pasta. The dry pasta needs to cook in the sauce so it can absorb flavor and release starch.
Step 6: Simmer Until the Pasta Is Tender
Cook uncovered for approximately 12 to 16 minutes, depending on the pasta shape and package directions.
Stir well every 1 to 2 minutes, especially around the bottom and edges of the pot.
The pasta is ready when it is al dente, meaning tender but still slightly firm when bitten. The sauce should look glossy and should lightly cling to the noodles.
If the pasta looks too dry: Add warm broth or water 1/4 cup at a time.
If the sauce looks too thin: Continue simmering uncovered for another 2 to 4 minutes, stirring frequently.
Do not walk away from the pot. Pasta releases starch as it cooks and can stick to the bottom if it is not stirred regularly.
Step 7: Add the Parmesan
Once the pasta is tender, reduce the heat to low.
Add the grated Parmesan a little at a time, stirring after each addition. Continue stirring until the cheese melts into the sauce.
If using baby spinach, add it now and cook for 1 to 2 minutes, just until wilted.
For creamy One Pot Tomato Pasta, stir in 1/2 cup heavy cream at this stage and warm gently. Do not bring the sauce to a hard boil after adding cream.
The finished sauce should appear smooth, glossy, and thick enough to coat the pasta.
Step 8: Taste and Adjust
Turn off the heat and taste the pasta.
Add more salt, black pepper, or red pepper flakes if needed. If the tomatoes taste unusually sharp or acidic, stir in 1/2 teaspoon sugar, taste again, and add the remaining 1/2 teaspoon only if necessary.
Adjust salt after adding Parmesan because Parmesan naturally contributes saltiness.
Step 9: Rest and Serve
Let the pasta rest in the pot for 2 to 3 minutes before serving.
This short resting time allows the sauce to thicken slightly and cling better to the noodles.
Stir in the chopped fresh basil. Serve warm with extra Parmesan cheese on top if desired.
For food safety, any meat added to the recipe should be fully cooked before serving. Ground Italian sausage should reach an internal temperature of 160°F, while chicken should reach 165°F.
Nutrition Facts
Cost To Make This Recipe
Item – Estimated Cost (USD).
12 oz dried pasta – $1.40.
1 tbsp olive oil – $0.20.
1 small yellow onion – $0.70.
4 garlic cloves – $0.30.
28 oz crushed tomatoes – $2.20.
3 cups vegetable broth – $2.00.
Italian seasoning – $0.15.
Salt and black pepper – $0.08.
Red pepper flakes – $0.07.
1/2 cup Parmesan cheese – $2.25.
1/4 cup fresh basil – $1.25.
Estimated Total Recipe Cost
Approximately $10.60 USD.
Estimated Cost Per Serving
Approximately $2.65 USD per serving.